MORE TENSION
Written by Brian Fotheringham
Edited by Michael Robertson & Leslie
Updated by Peter Darian
2004/04/22 18:49:04
TABLE OF CONTENTS
02 - Foreword
03 - Introduction
04 - The History of Towing
05 - Equipment
08 - First Tows
09 - Progressions
11 - Paragliding
12 - Higher Altitude Flights
15 - Reserve Parachute
17 - Step Towing
21 - Dolly Launches
23 - Radio Operation
24 - Rope Retrieval
25 - Signals
26 - Summary
28 - Tow Savvy Test
FOREWORD
Having gone through just over a year of towing after my intro. course on the bunny hill, I've experienced the ups and downs of learning towing. (I also spent many a weekend sitting in a field waiting for the winds to drop to beginner level so I could have the chance to learn towing.) During that time, I began doing much of the writing for, and editing of the newsletter for our tow club. It only seemed a natural extension to take on the task of creating a tow manual seeing as writing is now in my blood and learning to tow is still fresh in my mind (especially the "what not to do" parts of it). So here we are...
Hopefully writing this manual from the point of view of one who has just this past year learned the contents within, will ensure that all pertinent little tidbits of insider information will be passed to the reader. It seems as though just like everything else, the more we advance as pilots, the more we forget some of the little, less important but helpful things we learned as beginners. Although the bulk of the information comes from my year of experience, Michael Roberston and Leslie (last name withheld due to camera shyness), a couple of old pros at this towing thing, have done a job on editing this writing to ensure that anything of importance which I haven't thought of or experienced still gets its place in these pages. The end result is a manual written with the combined forces of young and old experience alike. I've just started to develop intermediate syndrome, so I'll be able to add the "middle age" stuff in the next edition.
This first edition of the manual will be expanded on in both writing and illustrations as feedback from the pilots who use it is gathered. The illustration part will improve dramatically once I either learn how to draw or hire an artist to do it for me, but so long as the drawings in this book are clear, I suppose they serve their purpose. As with all things in this sport, everyone's input is important, and pilot input regarding this manual can only help to make future editions a superior product.
A little warning before you read on...
As you already know, by the time you're learning to tow, hang gliding is generally a very safe sport, but can, in some cases, be very, very dangerous! As with any kind of instruction, this manual serves only as a guide to learning safe towing practices. Unfortunately, there is no way to predict all possible events or situations, so there is no way teach all of them in any one manual. Use this writing only as a part of your towing instruction, and be sure to seek professional help before attempting to tow. Instructors, other pilots and your own experiences and knowledge will be required to help you succeed and keep you safe.
Anyway, if you can learn the lessons contained in the pages that follow, take the time to practice, soak up knowledge from your instructors and fellow pilots and always fly safely, you'll soon be stepping your way to cloudbase and enjoying a freedom few people ever discover. Up is good!
See you in the Blue Room...
INTRODUCTION
Whether you've just finished your beginner course on the training hill or spent the last five years running off of giant mountains as spectators gasp in awe, you're eventually going to run into some evil flatlands or mountain sites with wholly uncooperative winds. In either case it becomes sickenly hard to get into the air and that, as you well know, isn't for the birds. Fortunately there is another solution: the wonderful art of towing.
To the foot launch fanatic, towing is virtually a portable mountain. Whether it's stationary winch, aero towing, payout winch or any other style, towing will get you into the air whenever you can't run into it! For the new student, it provides a super fast way to gain air time and skills. For the seasoned pilot it provides a variety of new experiences and ways to get to cloud base. For the competition sky dog and world record hound it offers new and varied venues. For tandem pilots and instructors it offers quick turnaround and flexibility. For all pilots, it provides a far greater freedom to do what we want to do most - FLY!
Towing has been evolving since a time before hill flying had begun and has developed in a number of different directions. In fact there are so many different ways to tow now that you can, to some extent, rediscover flying over and over again without ever being grounded. This manual will provide a brief history and discussion on the various kinds of towing available and how they came to be. The focus however, will be to describe, in detail, how to step tow using a stationary winch system. It covers many aspects of this particular type of towing including related tidbits such as radio operation and rope retrieval. At the end of the manual there is a set of test questions which you should be able to answer with a little reading and a little thinking. Once you understand what's covered in these pages, you'll be almost ready to step yourself to cloud base!
THE HISTORY OF TOWING
Contrary to popular belief, towing actually pre-dates foot launch in the hang gliding world. In its rawest form, it appeared in Australia through Moyes and Dickensen in 1962 and showed up here in the form of boat towing in 1968. In these early days the glider was pulled with the rope connected directly to the base bar which, as you'll learn later, resulted in huge lockout potential. Eventually the rope attachment was modified to connect to a bridle with releases at the top and bottom of the A-frame. This helped but certainly wasn't the future.
1976: The Hewitt Skyting Bridle was created. This new bridle hooked to the keel six inches in front of the centre of gravity (CG) and to the pilot. It instituted a light form of weak link.
1978: The use of three ring releases (from parachuting) began.
1981: Centre of mass aero towing begins using Trikes from France.
1984: Forburger's ATOL platform launch system was produced. It incorporated a payout winch with centre of mass towing. The glider would be mounted on the vehicle. This made tandem flying much easier.
1986: Three-string releases were implemented to avoid taking metal into the air unnecessarily.
1987: Greg Dewolf's Fly America Team flew from L.A. to North Carolina using successive tow launches.
1990: Stationary winch and step towing made it here to North America from Europe.
1992: Aero towing reaches new heights and levels of safety with the aid of new ultralight tugs, designed specifically for towing hang gliders.
With the continuing advances in towing, it is likely to become the future of our sport in many ways. Most of the world records for distance recorded in both hang gliding and paragliding over the recent past began with, or were initiated with tow launches.
EQUIPMENT
OK, let's get to the point. Enough about the past and the general state of affairs in the world. It's time to focus on how you're going to get in the air, because really, that's what this is all about. The first thing you need to become familiar with is the additional pieces of equipment used to get you in the air when towing. There aren't that many, but you need to know at least a little about each one before you can tow successfully.
The Winch
For stationary winch towing, the winch is basically just that - stationary. It may be on a trailer, it may be on the back of a pick-up truck, it may be attached to a NASA implemented retaining device, bolted to a cement block in the ground, or just about anywhere else you can imagine. The point is, once ready for towing (and during towing), the winch stays exactly where it is and pulls a glider into the air using a rather long length of line. Specifics about the winch aren't really important to the pilot as long as it is reliably designed and operated.
The Line
The line we use for towing is called Spectra. It is thin, light, hollow-braided line that is designed to withstand 1500-1800 pounds of tension (more than enough to pull a glider and pilot into the air). The drum on the winch usually has between 4000 and 7000 feet of line on it, but the line is never attached just in case a pilot inadvertently pulls all of it off. We call the combination of the line and the drum the "spool."
The Bridle
The line stretches from the drum on the winch to the glider/pilot. It is not attached to the drum, but is attached (indirectly) to a bridle which is, in turn, connected to the pilot via his release. We use a two stage release which requires two different ends on one length of rope and, as we have only one line coming from the winch, the bridle provides the split. It is little more than a piece of heavy rope, knotted off-centre by about 18 to 24 inches so that each end of it can be attached to a different part of the release and the "centre" attached to the line. Because the knot is off centre, the result is one of the two ropes reaching the glider being longer than the other. This is very important but will be discussed in a later section. Both of the ends will have a piece of thinner rope on the end, tied in a loop, which are connected to the release. The bridle is connected to the Spectra line with the use of a carabiner and the "weak link". This particular bridle is specifically for hang gliders. For paragliders, a simpler release setup requires only a straight length of heavy line for a bridle.
The Weak Link
The weak link, which is light mason twine or leech line, looks like thin, useless string in comparison to the Spectra line and the rope of the bridle, but it serves a special purpose and is extremely important when towing. As the name implies, it is the weakest part of the connection between the glider and the winch. It's there to be broken, if it needs to be. It is a safety link and it breaks quite consistently at a calibrated amount of tension to prevent over-stressing the system. The weak link will also be discussed in great detail in a future section.
The Release (Hang Gliding)
Our release basically looks like a curved metal tube with a couple of levers in the centre of it, a couple of small clips on the ends of it and a rope running through it. Three string releases can be used too, but we don't use them.
When attaching the release to your harness, attach the clips to the tow loops on the front/sides of your harness such that the levers on the front of it are to the right (all releases are right-handed), and place both ends of the rope, which should have bowline knots on them, into your main carabiner.
Each of the levers control one of two pins, one of which is spring loaded. Once the release is connected to your harness, you need to connect the bridle to the release (only after you've hooked in and done a hang check though). The lower pin should be inserted through the loop in the longer end of the bridle and into the lower release lever, while the upper pin on the release should be inserted through the loop in the short end of the bridle and then into the upper lever. The explanation of why the short rope goes on top and the long rope goes on the bottom will be explained later, but for now, just commit to memory, "long rope on bottom, short rope on top". Colour coding can help make this easier. It'll make more sense when you see the pieces. As a final note, be sure to have the two ends of the rope that goes through the release looped into your biner so that the release is technically hooked to the glider when you hook in. This ensures that the line pulls your glider, not you!
The Release (Paraliding)
A reliable two or three string release is fine. The lengths of the webbing or rope from the release to the harness 'biner must be equal though. This is important - slight differences will cause the canopy to tow crooked. There are neat limiters in some that automatically release during lockouts or hot climbs.
The Emergency 'Chute
An emergency parachute is recommended for all high flying, and required for step towing. You should attend a proper 'chute clinic to learn how to properly pack, deploy and use a 'chute. For towing however, it is important to understand that the release may be in front of your parachute, so you have to ensure that it is cleared away before you ever grab the 'chute handle and try to deploy it. You should also make sure while doing your hang check that you can fit your fist between your 'chute and the base bar.
The Line 'Chute
There is a small parachute between the end of the Spectra line and the weak link. Its job is to help control the line on its way to the ground after you've released it. In combination with the metal 'biner, it can be hazardous if the line goes slack, so be aware of its presence.
The Hook Knife
This is an almost mandatory, fail safe item for those really unusual foul ups. They are rarely of use but could save your life. The hook knife gets its name from its shape which is pretty much a handle with a hook at the end. Surprise! Inside the hook is a set of super sharp blades. The design is for catching lines, bridles, hang loops and anything else of that basic shape in the hook to make cutting it with the blade easier (as opposed to a normal knife) in emergency situations.
FIRST TOWS
Pre-Flight Inspection
Before you launch on tow, you must go through the same routines you would at the hill, plus check a few of new things.
RCR Scores
First and foremost, you should have completed both your WIND (Tow version) and WINDIVIDUAL RCRs. Sounds pushy, but we do them for a reason and you will be asked for your RCR score before the radio operator will launch you. You may be asked to explain your calculations, so it's not a good idea to randomly pick "85" out of the blue and use it. Keep in mind that you can have a large portion of the charts completed the night before or on your way to the tow field. Remember, SAFETY FIRST!
Glider Pre-Flight
Believe it or not, you can mess up your setup, even at a tow field (this is mentioned just in case there is some bizarre underground theory that pilots only forget to put pins in their base tubes when mountain launching). Always go through the same systematic pre-flight procedure after you set your glider up or after a hard landing.
Hang Check
Old faithful. This isn't some silly procedure students are taught in their introductory course that experienced pilots don't have a use for. EVERYONE does a hang check before they launch, EVERY TIME. For some reason, the odd pilot who has unintentionally forgotten to do one may not be around to explain the importance to us all. Hook in, check your lines, check your helmet, check your 'biner and set your vario before you even think about connecting the rope to your release (just in case the winch starts pulling in rope for some reason - dirt burn to the face can put a damper on after-flying partying). Also make sure that your release is at least one inch above the base tube while pushing it down with your hand.
The Line
Once you've completed your regular hang check, connect the lines from the bridle to your release. Remember to put the short line on top and the long line on the bottom (for HG). Always check the weak link to ensure it has the correct number of strands for your flight and that it isn't frayed. If it's been a while since your last flight, a practice release sequence is a good idea after hooking up the line.
Airspace
When you're towing, you launch from ground level and go up. This makes it extremely important that you check your airspace, not only for other gliders that may be coming in on approach, but for other aircraft that may violate the tow line once you launch.
Progressions
So now that you've got your pre-flights under control, it's time to talk about getting your feet off the ground. Although a pilot can be towed to 5000 feet, you don't start off that way. You see, we build to that.
Just like learning to walk or to launch off of a hill, you learn to tow from the bottom up. As a beginner, your first few tows will be at or within about five to ten feet off the ground and you may even find yourself running most of the distance (or at least a lot). Once you have displayed controlled flight at ten, you will move to maybe twenty, then fifty and so on. Until you have sufficient height, you will leave the line connected to your release for the entire flight. The main goal is to keep the glider level and pointed at the winch. Keep your eyes up and maintain a light touch on the down tubes.
Once you have displayed consistent control of the glider, you will be towed high enough to release the line and glide towards the winch, landing in front of it. Then, you'll be towed higher so that you can perform an "S approach" before landing near the winch. Eventually, you'll be towed high enough to release, fly back to launch and turn into the wind before landing near launch.
Launching
Launching on tow and launching from a hill are similar in some ways but drastically different in others. Once you have hooked in and performed your hang check, you need to attach the line to your release. Remember, long rope on the bottom, short rope on the top. For your first flights, be sure that only one of the ropes are connected and OVER THE BASE BAR.
While you are hooking in and attaching the line, give the radio operator/launch director (the person launching you) your name, glider type, RCR score and your flight plan so that he may relay this information to the winch operator (who needs to know it!) For your first tows, the INSTRUCTOR will give YOU the flight plan. It is important to always follow your flight plan, regardless of whether you're told what to do or have told someone else what you're planning to do. Of course you should always have various back-up plans laid out for use in the event of unplanned occurrences popping up during a flight.
Once all this has been accomplished, ask everyone to clear away from your glider, then pick it up and put it on your shoulders (grapevine grip) as you would for a hill launch. The only difference is that you should raise the nose of the glider slightly higher than you would on a hill. How much you should raise it is inversely proportional to how gusty the wind is. If the wind is gusty, keep the nose slightly lower to make the glider easier to control. If the wind is light, leave the nose higher. Remember that if the wind is cross, you must point the glider into the wind (crab), but still run straight towards the winch when launching. When the glider is balanced on your shoulders, you're ready for the next step - TENSION!
When you are comfortable, ask the launch director for tension. "Ready for tension please" is a nice way to do this. Once the request is radioed to the winch operator, he will take in the slack line - be ready for a tug. The tug will be followed by a constant pulling on the line, which you will be able to counter by planting your feet, one foot ahead of the other, knees bent and your back straight or leaning slightly backwards. When you are comfortable with the amount of tension (roughly as much as you can easily handle without pulling half of the muscles in your body), tell the launch director "tension is good, thank you." If you need to adjust the tension slightly, you may ask for a slight increase or decrease in tension via the radio however it is simpler to take a step back (to increase) or forward (to decrease).
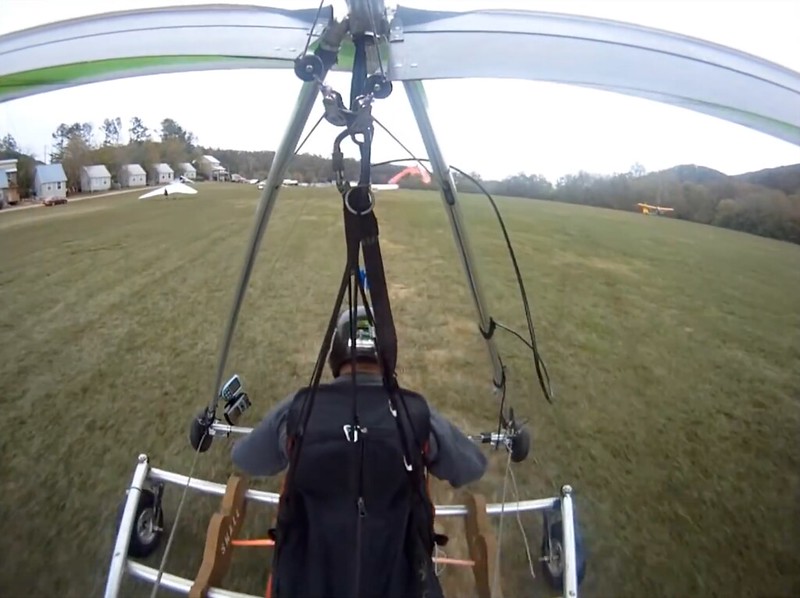
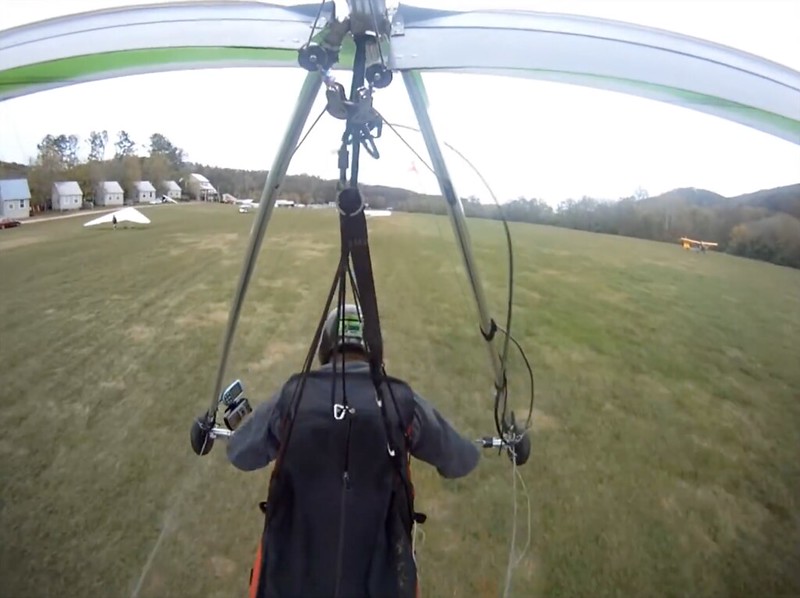
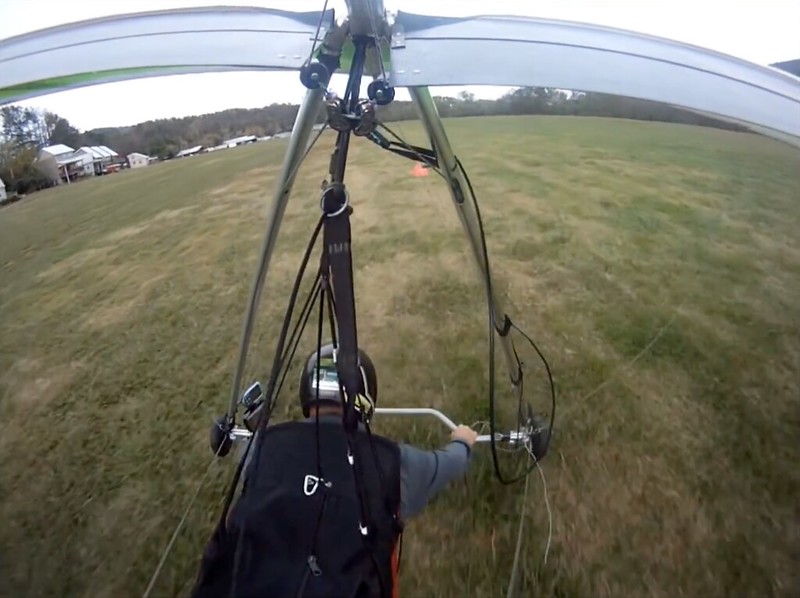
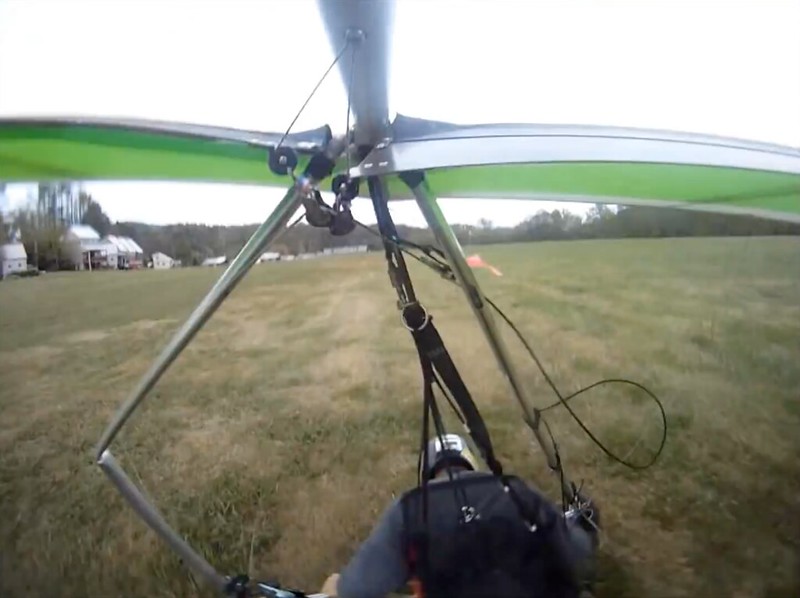
With tension on, you are ready for launch. When everything feels right, ask the launch operator to check your airspace. If you are told it is "clear", you may launch whenever you are ready. To launch, shout out loudly and clearly, "CLEAR AND LAUNCH". The launch director will relay this request to the winch operator who will increase the tension on the line well beyond the point where you can hold your ground. This is where the biggest difference between hill launch and tow launch arises. Instead of running forward with long hard strides and pulling the glider behind you as you would on a hill, the idea in towing is to resist the pull of the line as much as possible with your legs, and let it pull you. Be sure to maintain a light grip with your hands to let the glider find its angle of attack. It is very important that you resist the line, rather than trying to outrun it or jump into the glider. Just resist the pull as long as you can with your legs. As you are pulled forward, keep your eyes up, take long level strides, just as you would on a hill, and be sure to keep the wings level and angle of attack at trim. Don't pull in or push out. Before you know it, you will be in the air. Once you leave the ground, pull in slightly until you reach a hundred feet.
The two most important things to remember are these: Firstly, your number one priority is to fly the glider, so concentrate on nothing but controlling it! Be sure to never give up on trying to fix any course deviations that arise and always look where you want to go. Secondly, remember the word "ABORT". If at any time you feel like the launch just isn't going right, yell out loudly and clearly, "ABORT! ABORT! ABORT!" and the radio operator will signal the winch operator to cut tension immediately. Don't be surprised if the launch director aborts your launch, even if you think everything was going well. A good launch director may see something happening that you don't, and can concentrate on deciding whether or not the launch should be aborted (considering he or she is not having to worry about flying the glider). This applies to all pilots, not just beginners. Be understanding if a launch director aborts your launch. He or she is concerned for your safety when you are launching, and it's always better to restart a launch that didn't need to be aborted than replace the broken tubes or arms that can easily result from one not being aborted when it should have been.
Flying
For your first flights, your goal is to fly straight and level towards the winch. Keep your hands lightly on the down tubes, fly at trim (or a little faster - BUT NOT MUCH!) and try to quickly correct any changes in direction that you feel happening with nudges. If you start a turn, you will need to stop it with an opposite move. You will be leaving the rope on for the first few tows and, once your instructor tells you to do so on a later flight, you will release the rope by pressing the longer of the two levers.
The whole goal on the beginning tows is to learn to tow in a straight line. You want to get comfortable with launching, and controlling the glider in the air. At this point, don't worry about your landings - just use the wheels. If you're comfortable with your flying you can try a foot landing, but it is safer to avoid worrying about that until you have some more flying under your belt.
As a rule you will have a radio with you at all times on your beginner flights. Make sure before each flight that the radio is secure and turned on to full volume. Your instructor will communicate with you whenever necessary during a flight. Always listen to what he or she is telling you and do it, UNLESS YOU ARE SURE THAT DOING SO WILL BE DANGEROUS. Try to listen and react but remember that you are ultimately responsible for your own well-being, and that either or both radios can malfunction. If what you hear sounds or seems wrong, feel free to follow the plan that seems best.
Landing
As discussed, your very first flights will leave you with the rope still attached. It is fine to just land on the wheels, or ease out the bar and run out the landing. As you get a little higher and have begun releasing the rope, you can begin trying fuller flare foot landings if you are very comfortable. The main idea is to learn to control the glider all the way to the ground and continue staying level until you stop.
Until you are ready for higher altitude flights, your flight plan will always be to take off, fly towards the winch and land along the path of the rope.
* IMPORTANT: Never ever fly without an instructor present and a radio mounted to either your glider or you until you are informed that it is OK to do so!!!
Paragliders
The basics of stationary winch towing are the same for both hang gliders and paragliders. There are, however, a few differences in the way launching and controlling are done.
The procedure for launching a paraglider is exactly the same as for a hang glider up until the point of tension, except for two things. First, paragliders do not use a metal two-stage release but instead use a two-string release (these releases can be used since transition is not required). Second, paragliders are given more tension (prior to launch) once it is requested so less slack slips into the line during the inflation.
The launch procedure differs slightly to hang gliders.
Firstly, to assist the winch operator the pilot will tell the winch operator via the launch director when he is about to inflate. This can be transmitted as "READY FOR INFLATION" or "INFLATING". At this point there will be a slight pause and the winch operator will feel the slack in the line as the pilot moves forward during the inflation. The winch operator will start bringing the rope in very slowly to help keep it from going slack at the pilot's end. However, try to keep to one side of the line if there is slack.
Once content with the tension and the conditions, you inflate the canopy. When it is inflated and stable, the winch operator and/or launch operator will assume you are ready to launch and the clear and launch will be issued and the required tension will be applied. As the pilot you may wish to give the clear and launch command although not necessary.
Under tow, much less tension should be used. Hot tows/extreme climbs are extremely hazardous. Can you spell "collapse"? This probably wouldn't happen close to the ground though.
Some precautions and notes for paraglider pilots
With tension on the line, you will find that the canopy will inflate a lot quicker than normal with the additional pulling force. Be careful to keep control through the entire inflation. A little bit of brake may be required to stop the canopy overhead but the brakes should be released immediately after. Launching with the brakes on will tip the canopy farther behind you, which is a very dangerous situation close to the ground.
It is better to steer using weight shift control, rather than using the brakes. However brakes give a more instant and direct turn. If the glider is not responding to weight shift control or if there are obstacles to avoid, then you may have to use the toggles. Be smooth, gentle and reasonably light handed with the toggles.
Stay in an upright position until you are at least fifty feet above ground. Even higher if you have minimal harness padding.
At the time of writing, there were very few paraglider pilots compared to hang glider pilots. Chances are you are going to get a hang glider pilot launching you most of the time. Be sure that the launch director is familiar with the procedures and what you expect of them.
While on tow, the canopy is going to be a lot farther back than normal. If there is a line break or weak link break there is going to be canopy surges. To help dampen these, some brake should be applied when you are swinging backward and released when you are swinging forward. It is very important that you do not mix this up the wrong way.
The recommended procedure for releasing the line is to put both toggles into one hand and reach down with the other hand to activate the release. It is important to pick the release up and physically check that the line is in fact gone. With very light tensions at the time of release, sometimes the rope stays attached.
Step towing a solo paraglider is probably one of the most challenging jobs for a winch operator. To help alleviate problems, do not fly downwind with any brakes applied. Be prepared for tangles and rope snags heading downwind and don't be upset with the winch operator if this happens.
- When step towing, the rope will be to one side of when travelling downwind. Be sure to turn back the correct way to unwind yourself.
HIGHER ALTITUDE FLIGHTS
Control Differences (HG only)
The main difference when flying on tow as opposed to in open air is that the glider is being pulled. This changes the way the glider controls in that it can add a requirement for more control input while simultaneously increasing the amount of effect that control input has. If you find the glider beginning to oscillate or yaw, chances are you are going too fast. The solution is simple - slow down. Just ease the control bar out slowly until you regain control of the glider. Be sure not to push out too far or you'll slow the glider down towards mush, or even stall, which is potentially more dangerous than going too fast. Remember, once you have reached 100+ feet, the glider should be flown at trim.
The tension from the rope will make the glider feel as if you are flying through air much rougher than you really are. Maintain a light grip on the control bar and let the glider tell you what is happening. Try to react to changes with small corrections before they have time to put you off course and necessitate larger ones, and remember: No matter what happens, fly the glider first. While on tow, it is better to move your shoulders (the tow point) rather than your hips or whole body as you would off tow. Doing the latter will often cause an over-control oscillation.
Intermediate flights
Once you have demonstrated solid towing skills as a beginner on a shorter rope, you will be towed the full length of the field and land near the winch. After this, you will have enough height to release the line and perform 'S Turns' before landing at the winch end. Next, if conditions are right and the field is long enough, you will be given enough height to release the line, fly back to launch and turn into the wind before landing. Once you have demonstrated consistent success with these flights, you'll be ready to begin transitioning (which gets you even higher!)
Transition (HG only)
For your initial flights, only a single line was attached to your release through the A-frame and above the base bar of your glider. The next step is learning to transition so you can get higher. Note that this should never be tried without the consent of an instructor. Before you perform a real transition, your instructor may have you perform one or more 'mock' transitions, using both ropes above the base bar.
To set up for a real transition, you hook in like before, but you put the longer line of the bridle UNDER the base tube while keeping the shorter line OVER the base tube. So then, commit to memory "Long rope under, short rope over." Make sure that these are never reversed. Double check this because having them reversed could put you into a serious stall! When standing at launch with tension on, have a look to ensure that the bottom rope is indeed slack under the base bar and not pulling it up at all.
What will happen is that you will launch as you have been previously, but when you get to a good height (where the top rope is close to or touching the base tube and you are at a minimum height of 200 feet), you will release ONLY the top rope. The proper procedure for executing this radical move is to place your fingers behind both levers on your release, then use your thumb to press the upper release while flying the glider at trim with your free hand. If you are pulled in and remove one hand, you will initiate a turn. Do not stop flying the glider or spend time staring at your release when attempting to do this. It only takes a second for your glider to get way off course. Practice the motion of sliding your fingers behind the levers and clicking the upper one when you're on the ground either walking around or hanging in your bird. Some pilots will slide their left hand to the centre of the bar while letting go with the right hand to maintain control and avoid initiating a turn. Others "cheat" by making a small, quick bump to the right (while keeping the wings level), before making the transition move. Either is acceptable.
The net effect of releasing the upper line and leaving the lower attached is that it changes the attitude of your glider and gives you a much higher rate of climb. It will allow you to fly right over the winch. Be aware that you will feel a jerk when you transition. This is normal.
The Dreaded Lockout
In a word, scary. Lockouts don't happen often and rarely happen to the same pilot twice (mainly because the sudden need to change your underwear that it causes is more than a little unpleasant). The result of a lockout is an incredible amount of yaw that seems almost impossible to control (trust me - been there, done that). You'll know you've locked out if the glider begins making a serious turn to one side and you feel a lot more vertical, position wise, than you normally do. You also may soon feel a new horizontal position which involves either your right or left side being on the bottom, instead of your stomach! This, if you can picture it, is the result of the glider being pointed to the right or left instead of at the winch, with its nose way above where it should be, and the rope making the glider think it is level.
If you experience anything like this, try not to panic. The main thing is to continue to fly the glider. NEVER GIVE UP! Because the lockout is exaggerated by lack of air speed (poor nose angle), rely on your old friend Mr. Speed. Pull the bar in, move to the high side and keep it in until you regain control. Get speed and immediately begin trying to get the glider out of the turn it's in and pointed back at the winch. Keep the line attached unless you stray off course by more than 45° from your original path. If you do, release the line but don't stop flying the glider. Chances are you won't be very high if you've initiated a lockout as the most common cause is early transition or too little speed during it. So, once you regain control, be prepared to land wherever your are, be it a different field, the wrong end of the right field or wherever. You won't likely have enough altitude to return to your planned landing spot, so just get control and get down safely. For a far more detailed discussion on lockouts, check out the October 1996 issue of Hang Gliding.
The Weak Link (revisited)
Once you've advanced your towing to the point where you're doing full field length tows and landing back at launch, you should be responsible for all aspects of your flight. That includes the weak link mentioned earlier. Recall that the weak link is usually mason twine or leech line connecting the bridle to the Spectra line (actually to the carabiner attached to the parachute at the end of the Spectra). The purpose of the weak link is to break if something goes wrong during the tow to increase your safety. Examples of things that can break it are surges from the winch, too much tension, a tangle in the line or a wear from use.
In order to keep the weak link doing its job, it should be replaced regularly. It's the pilot's responsibility to check the weak link before each flight. If the weak link shows any fraying or has been put through several full tension tows, replace it. Remember it is there for your safety and is extremely cheap, so don't be cheap about replacing it! Mind you, only use a six to twelve inch piece, and only to make weak links - running out at 2:00 pm in the afternoon can ruin everyone's day. Even though you can buy mason line at any hardware store, it's a little inconvenient to drop everything and go a-shoppin'.
The idea is to match the pilot and glider weight roughly to the breaking strength of the weak link. As a general rule, solo flights will use four to six strands of weak link, tandems use eight strands and beginners and paragliders use four. From that, you might pick up that weak links are generally referred to as a number of strands. Each strand represents one occurrence of the weak link traveling between the bridle and the 'biner on the Spectra. Occasionally, you might hear a pilot refer to the weak link as a number of loops. In this case, the number would be half of the number of strands, as two strands form a loop. (Obviously this can't happen on a five strand weak link.) These are general rules for the leech line we normally use. Heavier/stronger leech line may require only one, two or three strands. It's simply a matter of finding the approximate breaking strength of whatever line is available.
If you are replacing a weak link which is to contain an even number of strands, simply loop a piece of weak link line through the loop at the end of the bridle and the biner at the end of the parachute so there are enough strands between the two, and the strands are one to two inches in length. Tie the two ends of the weak link line together using a fisherman's or reef knot with a half hitch in each end.
If you are adding a odd numbered weak link, tie it to the loop in the bridle using a bowline knot, loop it through the loop and the parachute carabiner as above until the appropriate number of strands are reached, then tie the free end to the parachute carabiner with another bowline knot.
Learn to replace the weak link and remember to check it before each flight. It's much quicker to put a new weak link on than launch, have it break, land half way down the field, walk back and then put on a new one!
In the off-chance the weak link does break when you're towing, remember to fly the glider first. If you have a fair bit of altitude, the nice thing to do is grab hold of the bridle, keep it in your hand and remove it from your release. Then, fly back over launch and drop it so that another pilot can use it. An even nicer thing to do is use a little common sense and drop it near launch, not on it! Considering how much damage a penny can do when dropped from a good height, chances are that a plummeting bridle will wreck a fair amount of havoc on gliders or pilots on the ground if it happens to hit one of them.
Releasing
There isn't an awful lot to releasing. Once you get almost over the winch, simply release the line. If the winch operator thinks you've waited too long, he or she will drop tension as a signal for you to release. If there are obstacles between you and the winch (or near by), try to release the rope at a point where it can travel safely to the ground without becoming tangled in a tree or something. If there is a cross-wind, it is good to fly a little upwind before releasing.
One thing to watch out for is the glider correcting its angle of attack when you release the rope. The tension from the tow will pull the nose upwards, and the natural reaction once tension drops is for the nose to come back down to its trim position. The feeling it produces is a sudden drop forward which, if you're like me and would rather kneel on rice than deal with the first hill on a roller coaster, just isn't very enticing. To minimize this dropping, just pull in some speed right before you release, holding the control bar in the centre so that a turn is not initiated.
Approaches
Once you have launches and straight tows under your belt, you'll find that you generally have enough time to release over the winch, fly back down wind to launch and putter about a bit before landing. The best thing to do with your puttering around is begin practicing proper approach patterns.
The approaches used in towing are the same as those used in mountain or hill flying. You will normally use either the figure eight or the downwind/base/final (three-leg or aircraft) approach. As a general rule, use the downwind/base/final when winds are light and the figure eight when they are stronger. If you are making your approach when another glider is ready to launch, be sure to either perform figure eight's behind the other glider, or make a very wide three-leg behind it, setting up your final to be clear of the tow path.
It is very important, whatever approach you make, that you make it on the LZ side of any obstructions including tree lines, buildings and power lines etc. NEVER perform figure eights or base turns more than 45° beyond these obstacles in case you miss-judge or run into unexpected sink. In a similar vein, be sure not to fly through the wind shadow caused by anything in the general area and, in cases where you do fly through it, keep good speed. In short, it's best to set up your final approach near launch, and target the middle of the field as your intended landing line. Again, be sure that this line is to one side or the other of the tow path, not along it. As always, its better to be safe and far less irritating to walk an extra thirty or forty yards than be hauled out of hydro lines or scraped off the ground because you tried to deal with all of the extra nonsense you'll usually encounter if trying to land ten feet from launch. Let common sense prevail - you have a big field, make use of it!
RESERVE PARACHUTE
It is mandatory to carry a reserve parachute when step towing and recommended for higher flights of longer duration or especially flying in traffic. It is also important that you in fact know how to use it.
Parachute clinics are generally held at least annually and it is strongly recommended that you attend one. These clinics generally involve hanging in your harness in a gymnasium, being spun, and actually pulling your chute out and throwing it. The rest of the day is spent airing out your deployed chute and then repacking it in your harness. Chutes should be repacked every six months.
If you're learning to tow, or just starting to tow high then there is a good chance that you haven't had the luxury of a chute clinic yet hence these guidelines for parachute care and deployment. However the information here is in no way a substitute for a good chute clinic so you should make a note of attending the next available clinic run by your club.
Mounting
Typically, hang glider parachutes are either chest mounted or side mounted.
The most common practice in Canada and the US are chest mounted parachutes. Chest mounted parachutes are mounted on the chest (imagine that) and are secured in the parachute container by velcro and locking pins. They have the following advantages and disadvantages:
Advantages:
The deployment handle can be easily reached with either hand.
They are safer in general as they offer chest protection (in an undeployed state) in case of a hard impact. Lives have been saved by the "cushion factor" that they give.
The velcro minimizes the chances of an accidental deployment.
Disadvantages:
The two-stage tow release sometimes obstructs the successful deployment and thus has to be moved out of the way. If the tow rope is still attached then it may be necessary to release the tow rope to allow the release to be moved out of the way. This slows down deployment time.
Velcro makes it more difficult to deploy. Ie. Has to be torn away correctly to release.
Sometimes causes discomfort having that much bulk right in front of you.
A practice that is a lot more common in New Zealand and Australia is the use of side mounted chutes. These chutes are used on pod harnesses only and generally mounted on the right hand side between the armpit and the waist. They are only secured by the locking pins.
Advantages:
- Easy deployment. As soon as the locking pins are pulled you have your chute in your hand.
- No obstructions by tow release or base bar.
- Some pilots enjoy not having the bulk of the parachute in front of them.
Disadvantages:
- Increased risk of accidental deployment. Locking pins have to be inspected closely before each flight as these are the only things holding your parachute in.
- Offers no protection to chest in case of hard impact.
- Often difficult to reach with opposite hand.
PREFLIGHT
Deploying a brick on a string or having an accidental deployment will ruin your day. Before you launch with a parachute there are some things you should check.
Bridle. The bridle normally runs up the harness mains and is attached to the carabiner. Ensure that it is indeed attached to the carabiner, otherwise it is useless.
Pins. Ensure that the locking pins are in place and secure. This is extremely important for side mounted parachutes.
Velcro (chest mounted chutes). Ensure that the velcro is in place and the chute is secure.
DEPLOYMENT
The chances of having to deploy are rare assuming you fly with some common sense and respect. The most common use of reserve parachute deployments in hang gliding are mid-air collisions and failed or badly executed aerobatics.
Reserve chutes are designed to bring you and your glider down and to save your life. Do not be fooled into thinking that you're combining skydiving with hang gliding. The glider will be brought down but will not necessarily be damage free. You will be alive but there is a good chance that you will be hurting or break something. Don't deploy unless you really have to.
Chances are you will know when it is time to deploy. You should deploy if your airframe fails or if you lose complete control of your aircraft without any hope of recovery (a tumble for instance). Once you've made the decision to deploy:
- Look at your deployment handle.
- If you have a chest mounted parachute then you will need to lift the tow release to get it out of the way.
- Grab your handle with both hands if possible.
- Pull your deployment bag free and the locking pins will break free. With a chest mounted parachute it means extending your arms fully down away from your chest to break the velcro. When it comes free you will be holding the bag that contains your parachute.
- Look for clean air and throw your parachute. Try and throw it in the direction you are spinning (chances are you will be spinning) and downwards.
- Grab the bridle if you can (without wrapping it around your arm) and yank it to help pull the parachute out of the deployment bag. If it doesn't come free then pull it in towards you with strong yanking motions.
- Let go of the bridle once the chute is open and try and climb into the A-frame.
- Locate your hook knife. Don't let go of the glider - just be prepared to use it.
- Once you hit the ground try and collapse the parachute. If you end up getting dragged it may be necessary to cut free of the chute with your hook knife.
SWIVELS
Swivels are a device that enables the broken glider to spin without wrapping up the bridle and eventually closing the parachute. If you do not have one it may be an idea to get a swivel kit or upgrade to a newer more reliable, slower descending parachute that comes equipped with a swivel.
MODERN PARACHUTES
Modern parachutes are often of the pull down apex style which offer a slower descent with reliable opening. If you have an older parachute you may want to consider upgrading.
