1. I'd strongly recommend leaving the Linkage the specified length and increasing the Lanyard length as required.
- Extending the Linkage limits your ability to trim aft/slower. That's not going to be much of an issue on this particular glider but if you ever wanted to use it on a solo with a bit of performance...
- The Lanyard is easily constructed/adjusted/replaced. The Linkage isn't.
2. I'd leave the Tensioner Anchor a short fixed length and adjust or replace the Tensioner line as required. That's easier and leaves you with less crap in the airflow.
3. The basetube bungee system is rather nice but DO make sure that's something you really want to do. Installation is a big and critical operation.
I want a pulley at the low end of the left downtube to pull at a 90° angle.
I don't understand this. That would have the lanyard exiting the downtube to a mostly horizontal path and you want it coming out straight down.
http://www.flickr.com/photos/aerotowrelease/8306300488/
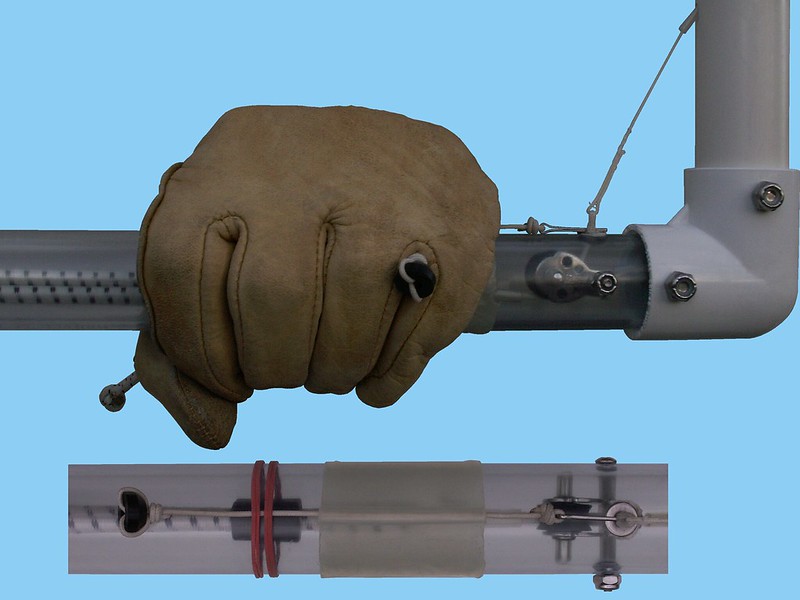
If that were on the glider instead of on the model the downtube would be angled in as it rises to the apex and the lanyard would be vertical / coming straight down into the basetube.
Having the lanyard exit horizontally is what you'd want if you were going to pull the lanyard yourself instead of having the bungee do it. Then you'd be engineering as you would for a VG cord (which isn't a bad idea).
need an idea to protect the lanyard through the downtube hole...
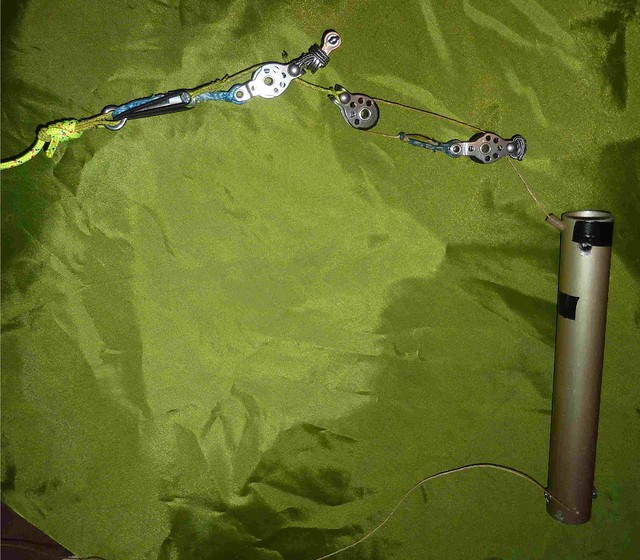
If the lanyard is exiting the downtube vertically - as is the case in my configuration - just duplicate what I have done for my downtube.
If it's exiting horizontally after being rerouted around an internal pulley just mostly duplicate the basetube configuration:
http://www.flickr.com/photos/aerotowrelease/8306095455/
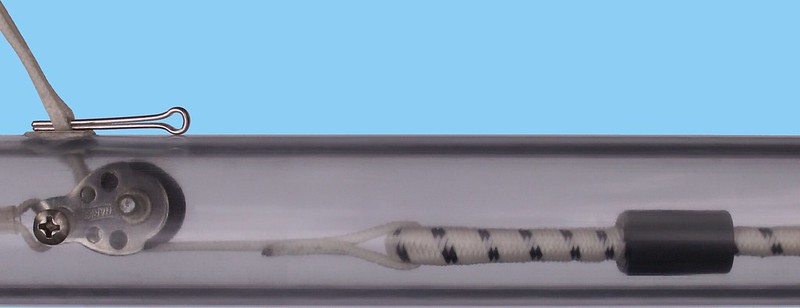
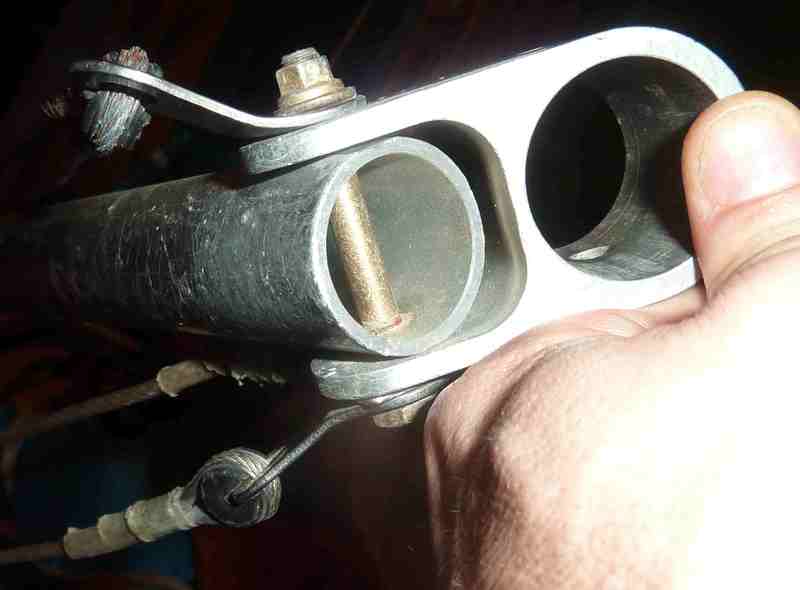
There's nothing protecting the Leader as it runs through the basetube because when it's under tension it's centered in the hole and isn't in contact with anything. (The drilling to achieve this condition is, of course, critical. Calculate is best you can, start out with a small diameter drill bit, and bias the opening if/as necessary as you enlarge.)
Rather than a nylon tubing as a base I use a vinyl...
The nylon tubing I use is hard and has a slippery feel to it. I would think you'd get better performance out of it.
screw is fore to aft on the top of the downtube..
Ooh... Hadn't considered that problem. It would always be lateral on gliders with faired downtubes.
I'm afraid the best idea I have is to drill for a small diameter lateral screw just below the extent of the plug.
don't really understand where to anchor the keel extensions
My glider - the HPAT - had a design which was very conducive to anchoring the release assembly.
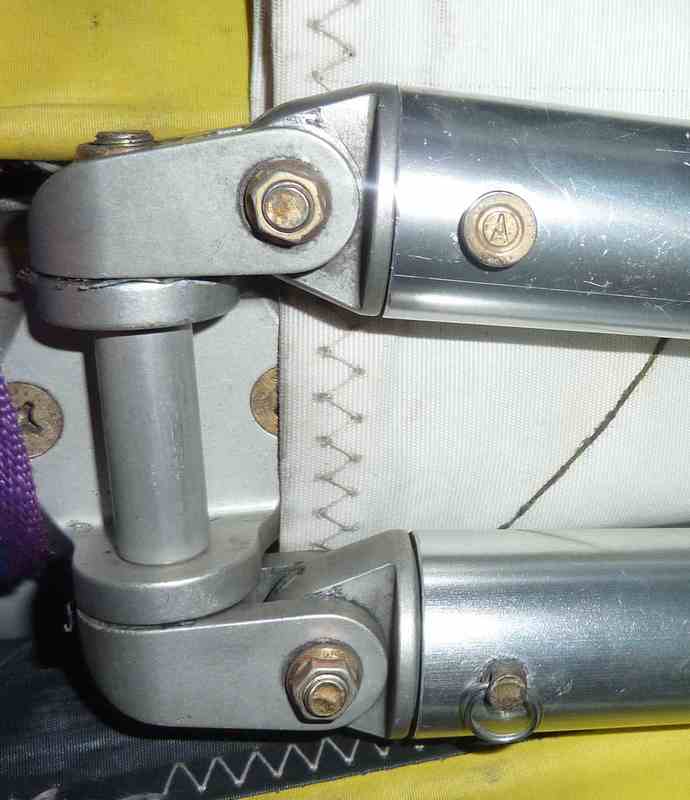
In your fourth photo there's a cylindrical aluminum spacer through which the control frame apex bolt passes. I would anchor to that spacer and use spacers of some kind on the ends to keep the harness centered.
Your apex doesn't seem to match what's in the Falcon 3 owner's manual but it's what I have on my HPAT and I first anchored to that cylinder when I started developing my AT releases. Of course back then I was using a 130 pound Greenspot weak link so my chances of deforming anything were way less than zero. But you shouldn't be loading that release to more than 375 pounds and I can't imagine a problem with that kind of stress either.
How much is the tension in your stretched bungees ?
Bungee tension - like damn near everything else in aircraft design - involves a tradeoff. The greater the tension the more kick you can deliver to your release mechanism but the harder it becomes to pull the pin. I think at eighteen pounds bungee tension it was starting to require a little effort.
A max loaded Falcon 3 Tandem is 571 pounds.
With the Keel Release loaded to 375 pounds your towline tension is 652 which is 1.14 Gs.
My test results for my release gave a load to actuation ratio of 16.41. And you get a two to one boost from the pulley so 32.82. So at 1.14 Gs the bungee tension needs to be 11.4 pounds plus some more for safety margin.
And bear in mind that the bungee needs to take the slack out of the system first and as it contracts it starts losing power fast. So I'd want it stretched to be pulling eighteen pounds on the pin.
Let's have a look on my pics for comments..
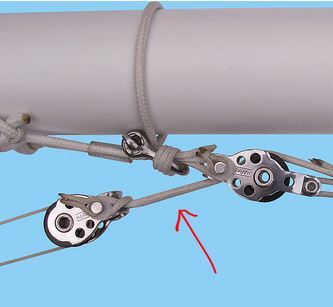
1. It looks like you may be using perlon/nylon line for your Tensioner. The orange Tensioner line in some of my earlier photos is perlon. Not one that I noticed in the air but that was a mistake. Everything in the system should be minimal stretch. You don't want the release to be slapping back into the keel upon release any harder than necessary.
2. The drilling for your Basetube Pulley Screw appears to be high / off center.
It's difficult to keep things properly aligned when you're drilling tubing and here's what I do...
- Run one end of a long pin just through the factory holes for the tubing and tension the short end with a rubber band stretched along the tubing such that the pin will be set perfectly aligned with the holes.
- Clamp the tubing to something stable and use a plumb line to sight the pin and adjust to align the pin/holes perfectly vertically.
- In the vicinity of the points at which you wish to drill use a pencil to densely scribble marks across the top of the tubing.
- Place one end of a long construction level on the tubing and, while keeping the bubble centered, slide the end across the pencil marks to create a line across the top colinear with the top factory holes.
- Wrap a short strip of paper around the tubing and mark it where it starts to overlap to show the circumference of the tubing.
- Remove the paper, align the beginning end with your mark, fold, and mark the crease (so as to determine the opposite / half way point in the circumference).
- Measure from the end of the tubing to the point at which you wish to drill and mark on your scored line.
- Center punch this mark.
- Align the end/corner of your paper strip with the centerpunched mark.
- Wrap the strip back around the tubing and use the half way mark to determine the opposite/bottom point and center punch.
- If you need to drill perpendicularly to the factory holes fold and mark your strip to determine quarter/horizontal points.
I hope that made sense.
3. Make sure the inside of your tubing is cleaned out after drilling. Aluminum particles won't do pulleys or lanyards any good.
Really happy to see you doing this. Too bad the US is so dedicated to putting a thousand times as much effort into defending and institutionalizing the shit it put into the air decades ago as it is in doing the job right. I so do hope France kicks its ass and starts showing up at competitions with equipment that humiliates the Yanks and Aussies.
P.S. It really pisses me off that Wills Wing is selling tandem gliders they know goddam well are gonna be used almost exclusively for aerotow rides and training and are - for all intents and purposes - telling everybody to slap on a Wallaby release and use a piece of rope to tie it to the kingpost. What a shoddy crappy way to run an airline for decade after decade with no glimmer of a hope of anything ever getting any better.

 pic 1
pic 1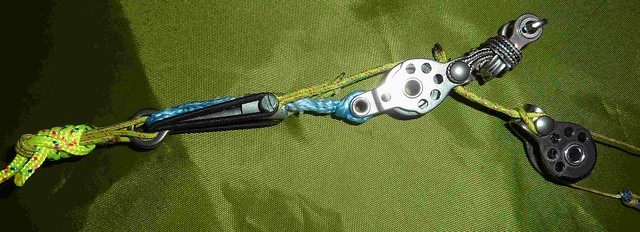 pic 2
pic 2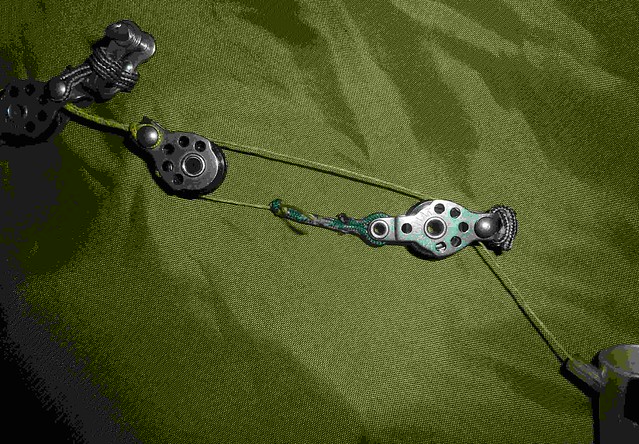 pic 3
pic 3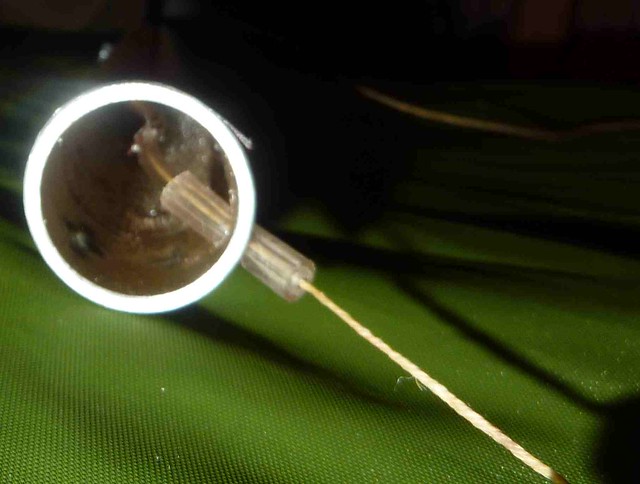 pic 4
pic 4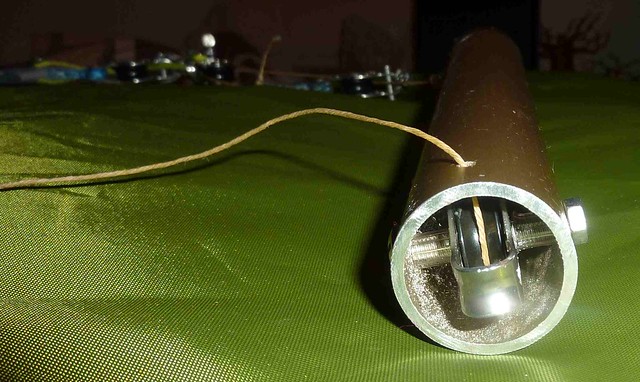 pic 5
pic 5


 pic 1
pic 1 pic 2
pic 2 pic 3
pic 3 pic 4
pic 4 pic 5
pic 5
