instructors and other qualified pilot fiends

General discussion about the sport of hang gliding
User avatar
Tad Eareckson
Posts: 9161
Joined: 2010/11/25 03:48:55 UTC

Re: instructors and other qualified pilot fiends

Post by Tad Eareckson »

http://www.hanggliding.org/viewtopic.php?t=29575
another blown launch !!
Tom Emery - 2013/08/01 00:33:48 UTC
San Diego

1000000

Rob McKenzie calls it "the million dollar crash". If you survive it and learn from it and never crash again... well you get the picture. I've had mine. Twice. Shook me up so bad I almost quit. Instead I went back to taking some more lessons.

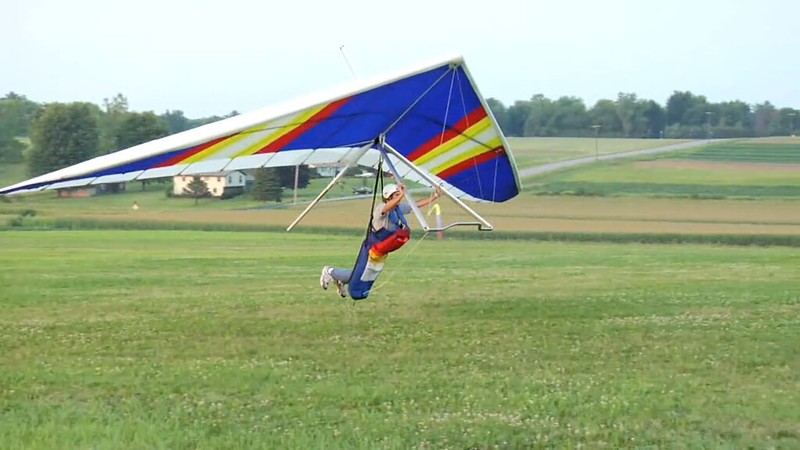
Rob dropped another pearl, "the takeoff is the most fun part of flying". It involves three components. The lift and balance, the run out, then the lift off.
Yeah. Just make ABSOLUTELY CERTAIN you NEVER lift the wing so high as to hit that deadly turbulent jet stream always lurking a few inches over whatever level it is that your suspension is still slack.

Hey Tom. The lift and balance, the run out, then the lift off...

http://www.hanggliding.org/viewtopic.php?t=13359
Today was a bad day!
Rob McKenzie - 2009/08/26 17:26:12 UTC
San Bernardino

I like variety. Sometimes AUSSIE and sometimes not. It helps to bring the thought process alive. Routine leads to boredom which leads to reactive thinking which IMO is a poor facsimile of true thinking.
Sounds like a routine that could lead to boredom which could lead to reactive thinking which IMO is a poor facsimile of true thinking. Shouldn't you vary things a bit to help bring the thought process alive?
- Leave the glider resting on your shoulders rolled five or ten degrees to the left or right.
- Just stroll down the slope.
- Jump into the harness when you think you're going fast enough.
He said a lot of pilots compress it into two components, forgetting the run out phase.
Yeah, that's the sorta thing I'm talking about... Forget the run-out phase, leave the carabiner clipped to your shoulder strap, slow the glider down ten feet off the deck in the LZ once in a while. Variety. Helps bring the thought process alive. Stimulates adrenaline rushes and true thinking.
After the remedial lessons, I have to agree with the fact that launching has become one of my favorite parts of the equation.
Tell Rob to go fuck himself for me.
User avatar
Tad Eareckson
Posts: 9161
Joined: 2010/11/25 03:48:55 UTC

Re: instructors and other qualified pilot fiends

Post by Tad Eareckson »

http://www.hanggliding.org/viewtopic.php?t=29575
another blown launch !!
Paul Walsh - 2013/08/01 08:57:39 UTC
UK

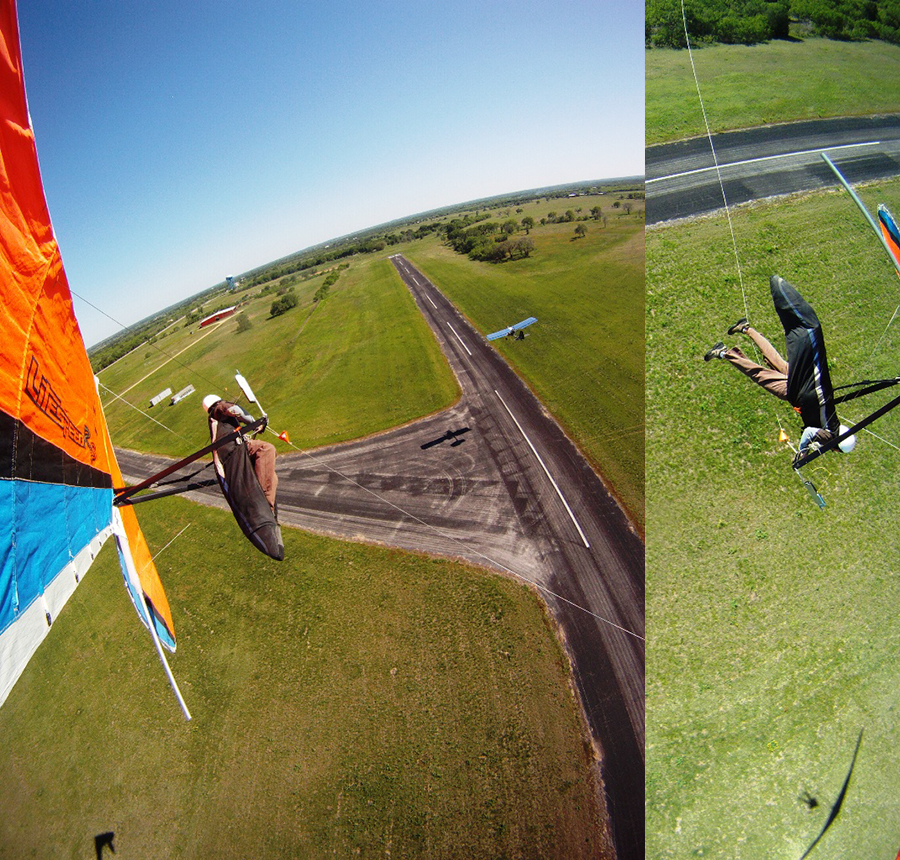
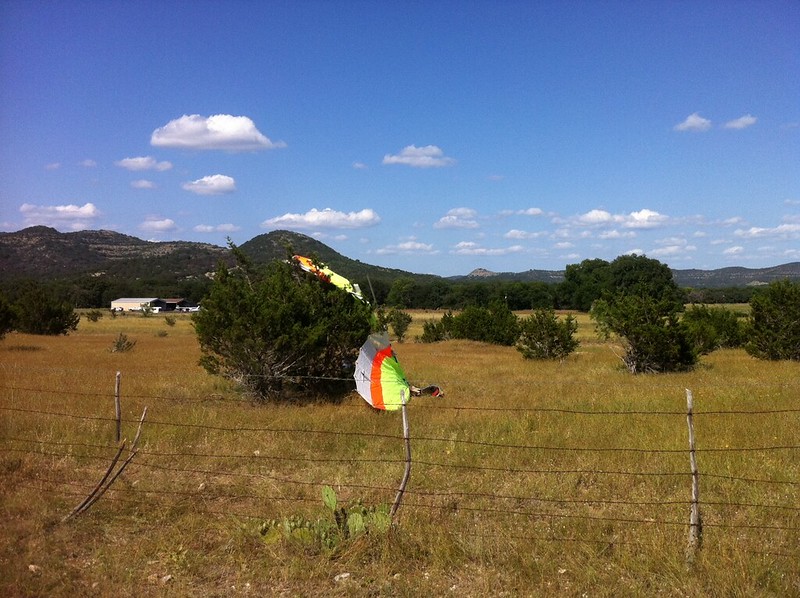
I think the age of GoPro and YouTube have had a positive influence in this respect. See all those mishaps and crashes. Shows clearly just how easily and fast it can all go west.
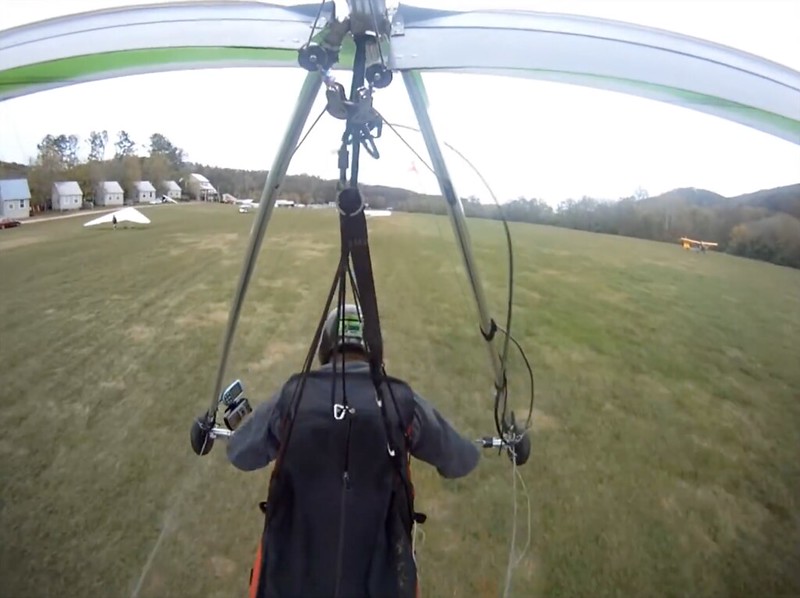
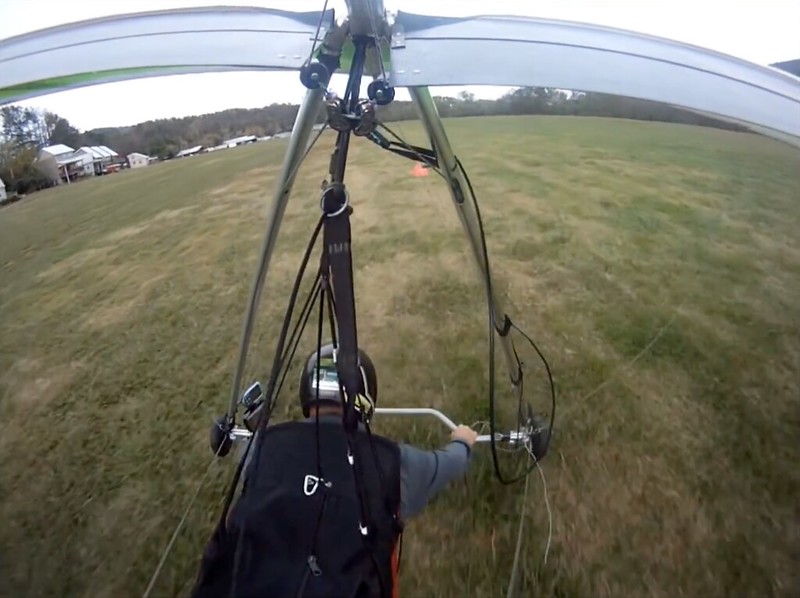
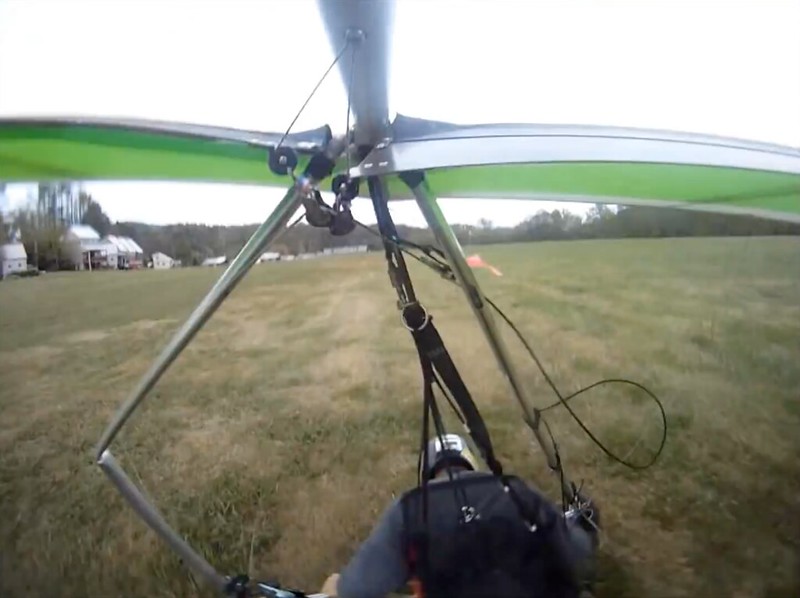
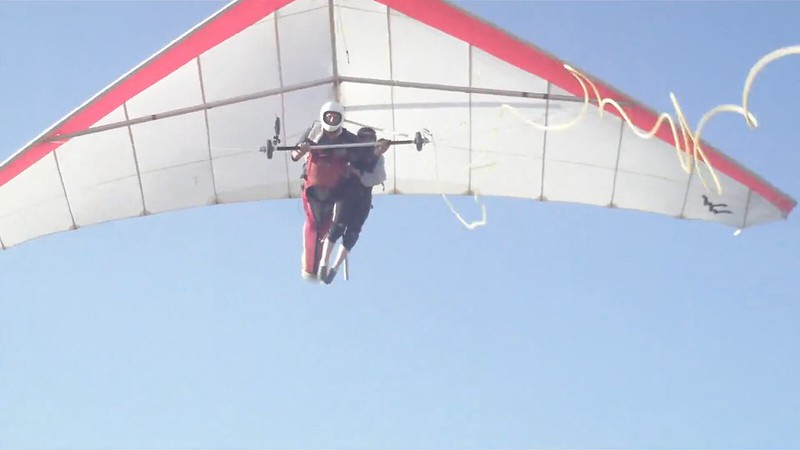
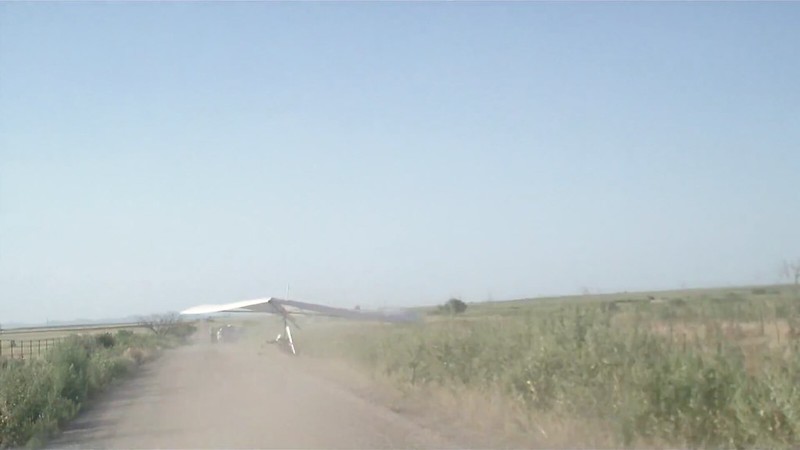
Right. We show you these Rooney Link pop videos:

http://www.youtube.com/watch?v=IjncKQ02FJ8

http://www.youtube.com/watch?v=eTKIAvqd7GI

04-2301
http://c2.staticflickr.com/6/5535/14077566935_0a5d82d279_o.png
Image
08-2323
http://c2.staticflickr.com/6/5553/14097605903_0e4c69be73_o.png
Image
21-2900
http://c2.staticflickr.com/6/5156/14074342991_52404ffb88_o.png
Image
22-2907
http://c2.staticflickr.com/8/7345/14077539605_d356a1f6fd_o.png
Image
http://www.youtube.com/watch?v=VYe3YmdIQTM

http://www.youtube.com/watch?v=IrAZdy6Ckv8

http://www.youtube.com/watch?v=WFAPpz6I6WU

http://www.youtube.com/watch?v=2WtDFymXlPU

13-10410
http://c1.staticflickr.com/3/2910/13891037280_0d42b84bbf_o.png
Image
Image
http://c2.staticflickr.com/8/7409/13890988198_2c1f79fa23_o.png
33-10814
0:50
http://www.youtube.com/watch?v=JR_4jKLqrus


about a zillion times and when some hotshot flyboy finally slams in hard enough to kill himself it COULDN'T POSSIBLY have happened because the fishing line broke. The fishing line can only INCREASE the safety of the towing operation - at the cost of just a bit of inconvenience every now and then.

Paul Tjaden has personally had NUMEROUS weak link breaks on tow, both low and high, after hitting turbulence and has NEVER felt in danger of a tumble. He's witnessed COUNTLESS OTHERS have weak link breaks with no serious problems. Quest trains aerotow pilots how to handle that situation and he's certain that Zack had also encountered it MANY times before and knew how to react properly.

We really have no idea what really happened on that tow and probably never will.
The negative is newbies seeing all those blade wings flying so effortlessly doing loops and wingovers and they think.......I can do that.
Yeah Dude. That's one of our big problems in hang gliding. Newbies seeing all those blade wings flying so effortlessly doing loops and wingovers and thinking... They can do that.

Or maybe it's more that they watch bullshit like THIS:

http://vimeo.com/4945693

15-3703
http://farm4.staticflickr.com/3677/14267100052_9ba5bb5bdc_o.png
Image

and think that if they can't pull something like that off in turbulent air hundreds or thousands of times over without snapping a downtube, arm, or neck every now and then that there's something seriously wrong with them as pilots and human beings.
Steve Davy
Posts: 1338
Joined: 2011/07/18 10:37:38 UTC

Re: instructors and other qualified pilot fiends

Post by Steve Davy »

Tad Eareckson wrote:If you do and understand hook-in checks you are scared BEFORE you find yourself airborne because you're assuming you're not hooked in. And that fear causes you to verify that you are at the critical instant and tends to trigger a quick reconsideration of all the other shit that matters.
Wouldn't it be more accurate to say "And that fear causes you to verify that you aren't"?
User avatar
Tad Eareckson
Posts: 9161
Joined: 2010/11/25 03:48:55 UTC

Re: instructors and other qualified pilot fiends

Post by Tad Eareckson »

No, I think I was OK:

"And that fear causes you to verify that you are (hooked in) at the critical instant..."

But hell, who cares? As long as you're scared and check it doesn't matter whether you're hooked in or not. Either way you get to drive home at the end of your outing.

And if you're not scared enough to check I don't give a rat's ass whether you plummeted to the base of the escarpment or set the new site XC record. You got killed at least for the purpose of the exercise and, if not enough to make the news, you set yourself and everyone following your example up a little better for the next time.
User avatar
Tad Eareckson
Posts: 9161
Joined: 2010/11/25 03:48:55 UTC

Re: instructors and other qualified pilot fiends

Post by Tad Eareckson »

http://ozreport.com/forum/viewtopic.php?t=24846
Is this a joke ?
Jim Rooney - 2011/08/25 04:55:25 UTC

I mean seriously... ridgerodent's going to inform me as to what Kroop has to say on this? Seriously? Steve's a good friend of mine. I've worked at Quest with him. We've had this discussion ... IN PERSON. And many other ones that get misunderstood by the general public. It's laughable.

Don't even get me started on Tad. That obnoxious blow hard has gotten himself banned from every flying site that he used to visit... he doesn't fly anymore... because he has no where to fly. His theories were annoying at best and downright dangerous most of the time. Good riddance.
- What exactly did I do to GET MYSELF banned from every flying I used to "visit"?

- I know I've asked you this before but how do you know I've gotten myself banned from every flying I used to "visit"? You have no fuckin' clue how many sites I used to "visit".

-- I started "visiting" sites while you still just a disgusting little larva.

-- I've "visited" sites that were never flown before and almost assuredly haven't been flown since.

-- Before I burned out on the drive my primary site was Woodstock - which is George Washington National Forest. You got documentation on me being banned from there?

-- The only places I MAY HAVE been banned from use Dragonflies to get gliders airborne and I have no desire whatsoever to again get behind one of the assholes who normally fly them and their 130 pound Greenspot tow mast breakaway protectors.

-- And I wasn't BANNED from Ridgely because - much as those Highland Aerosports shits believe and want everyone else to believe - it's a fucking public airport that they don't own. And they refused to tow me ONLY because they didn't want me talking to the (useless goddam) FAA and probably did so illegally - which is exactly the way they conduct aerotow operations and always have.

-- I didn't just "visit" sites, motherfucker - I FLEW them. I set a duration record at Smithsburg; pioneered Ritchey Knob, a couple of bluffs on the Chesapeake, and some badlands buttes in North Dakota; won an altitude gain comp at Currituck, a Pulpit comp, and a Capitol club year long XC comp - all long before some asshole at Ridgely let you clip into a glider all by yourself.
Jim Rooney - 2013/03/07 18:24:58 UTC

Go back to Tad's hole in the ground.
While you're there, ask him why he was banned from every east coast flying site.
How 'bout we ask you? You've never been shy about fabricating whatever's been most convenient at any given moment.

And you'd think there'd be hundreds of people from all these scores of places from which I've supposedly been banned ONLY TOO HAPPY to cut loose with all dirt. How come nobody's coming out with it the way they're doing Dell? Is that 'cause the dirt on Dell actually exists and can be documented and there's absolutely nothing on Yours Truly?

And why does it bring you such unbridled joy to know that I have nowhere to fly?

Here's an alphabetized list of motherfuckers that I totally despise:

Jack Axaopoulos - Peter Birren - Adam Elchin - Marc Fink - Jim Gaar - Tom Galvin - Bo Hagewood - Sam Kellner - Mark Knight - Steve Kroop -
Bob Kuczewski - Jim Rooney - Bruce Satatis - Cragin Shelton - Mitch Shipley - Davis Straub - Tracy Tillman - Dan Tomlinson - Bart Weghorst -
Ryan Voight

Amongst that crowd and its victims I can document:

- one overloaded bent pin barrel release welded shut at altitude

- one torn tendon as a consequence of a blown foot landing at a private airstrip

- one broken keel as a consequence of a Rooney Link pop

- one student arm broken in four pieces as a consequence of the Rooney Link instruction given

- one arm broken by a participant in the landing clinic being conducted

- one really spectacular aerotow lockout just a little too high to be fatal

- two blown dolly launches resulting in thirteen stitches in the lip and a near broken neck for one and the breaking of four ribs and a larynx for the other

- one face rearranged at the other end of the scooter rope being controlled

- one dead glider jockey at the other end of the platform rope being controlled

- three parachute deployments as consequences of blown aerobatics - including one really amusing one in which the bridle wasn't connected to anything and a lengthy hospitalization ensued

- four unhooked launches - one resulting in a fair beating and the other, a tandem, relatively minor injuries to the passenger and a long hospitalization for the pilot

- one unhooked launch resulting in a dead Hang Three who'd been coached on hang checks by the observer/perpetrator exactly two weeks prior

- one botched landing approach resulting in a dead student and a lengthy hospitalization for the tandem instructor

The ABSOLUTE *LAST* thing I want to see is people I despise stop flying. There is very little at this stage of my life that I could realistically hope for than to see some piece of shit like you or Adam buy it the way Zack Marzec did. I don't even want them to stop teaching, towing, flying, equipping other people. The carnage has gotta keep getting worse for there to be any hope of it getting better. (Keep flying those cute little five year old kids, Mitch. Then when you pull an Arlan on one of them we can make sure the media gets to hear that quote of yours about how important risk is in maintaining the thrill of hang gliding.)
His theories were annoying at best and downright dangerous most of the time.
So why wouldn't you want me flying with my death dealing one and a half G Tad-O-Links and funky shit homemade releases in midday conditions?

I'm ABSOLUTELY *DELIGHTED* to have you flying nothing but pro toad bridles with bent pin barrel releases that you can easily close on thick ropes without weak links and nothing so much as an ounce over 130 pound Greenspot lockout protectors and taking as many flights in excellent soaring conditions as possible.

The reason you're happy that I've been blacklisted out of circulation is because you know I'm about a thousand times smarter than you and all your totally incompetent asshole buddies put together could ever hope to be, my equipment is second to none, people were noticing that the ONLY launch crashes at Ridgely were consequences of Rooney Link pops, and I was exposing you and all your totally incompetent asshole buddies as the liars, frauds, and serial killers that they are.

And one more thing on the subject...
While you're there, ask him why he was banned from every east coast flying site.
The Press - 2006/03/15

The Civil Aviation Authority (CAA) is urgently pushing for new hang-gliding industry standards after learning a hang-gliding pilot who suffered serious injuries in a crash three weeks ago had not clipped himself on to the glider.

Extreme Air tandem gliding pilot James (Jim) Rooney safely clipped his passenger into the glider before departing from the Coronet Peak launch site, near Queenstown, CAA sports and recreation manager Rex Kenny said yesterday.

However, he took off without attaching himself.

In a video, he was seen to hold on to the glider for about fifty meters before hitting power lines.

Rooney and the passenger fell about fifteen meters to the ground.
How 'bout we ask you how come you're not doing tandem rides for the tourists at Extreme Air in New Zealand anymore? Did you get pissed off because you didn't make Employee of the Year for the third time straight and tell them they could take that job and shove it? Or did that two and a half month vacation you took at New Zealand taxpayer expense at one of their fine medical facilities get bundled with a one way plane ticket to LAX?

You tell me how you deserve a criminal negligence charge less than Jon Orders. At least after he screwed the pooch he made every effort he could think of to save his passenger. You made every effort you could to save yourself at the expense of crashing your passenger into the powerlines - which could've killed her just as dead as Jim Freer was as a consequence of electrocution or Kevin O'Brien was as a consequence of just clipping them.

Ironic, don't you think?

- I worked my ass off for years to campaigning for better equipment, procedures, standards, enforcement and the FAA responded by totally ignoring me and USHGA, Trisa, Tim Herr, the Industry responded by watering down, gutting, eliminating regulations concerning equipment, procedures, standards.

- You've spent your entire career fighting against decent equipment, procedures, standards, enforcement and you moved things in the direction I wanted to see them go just by skipping hook-in checks.

http://ozreport.com/forum/viewtopic.php?t=30971
Zach Marzec
Jim Rooney - 2013/02/11 19:22:18 UTC

Sorry, I'm sick and tired of all these soap box bullshit assheads that feel the need to spout their shit at funerals. I just buried my friend and you're seizing the moment to preach your bullshit? GO FUCK YOURSELF!!!!!!!!

I can barely stand these pompus asswipes on a normal day.
Keep up the great work dude. And with a bit of luck we can hear Lauren telling Deltaman to GO FUCK HIMSELF after he spouts his shit at YOUR funeral.
User avatar
Tad Eareckson
Posts: 9161
Joined: 2010/11/25 03:48:55 UTC

Re: instructors and other qualified pilot fiends

Post by Tad Eareckson »

http://www.docstoc.com/docs/112851827/More-Tension-Brian-Fotheringham-Michael-Robertson-Leslie-Peter-Darian
MORE TENSION - Brian Fotheringham / Michael Robertson
MORE TENSION

Written by Brian Fotheringham
Edited by Michael Robertson & Leslie
Updated by Peter Darian
2004/04/22 18:49:04

TABLE OF CONTENTS

02 - Foreword
03 - Introduction
04 - The History of Towing
05 - Equipment
08 - First Tows
09 - Progressions
11 - Paragliding
12 - Higher Altitude Flights
15 - Reserve Parachute
17 - Step Towing
21 - Dolly Launches
23 - Radio Operation
24 - Rope Retrieval
25 - Signals
26 - Summary
28 - Tow Savvy Test

FOREWORD

Having gone through just over a year of towing after my intro. course on the bunny hill, I've experienced the ups and downs of learning towing. (I also spent many a weekend sitting in a field waiting for the winds to drop to beginner level so I could have the chance to learn towing.) During that time, I began doing much of the writing for, and editing of the newsletter for our tow club. It only seemed a natural extension to take on the task of creating a tow manual seeing as writing is now in my blood and learning to tow is still fresh in my mind (especially the "what not to do" parts of it). So here we are...

Hopefully writing this manual from the point of view of one who has just this past year learned the contents within, will ensure that all pertinent little tidbits of insider information will be passed to the reader. It seems as though just like everything else, the more we advance as pilots, the more we forget some of the little, less important but helpful things we learned as beginners. Although the bulk of the information comes from my year of experience, Michael Roberston and Leslie (last name withheld due to camera shyness), a couple of old pros at this towing thing, have done a job on editing this writing to ensure that anything of importance which I haven't thought of or experienced still gets its place in these pages. The end result is a manual written with the combined forces of young and old experience alike. I've just started to develop intermediate syndrome, so I'll be able to add the "middle age" stuff in the next edition.

This first edition of the manual will be expanded on in both writing and illustrations as feedback from the pilots who use it is gathered. The illustration part will improve dramatically once I either learn how to draw or hire an artist to do it for me, but so long as the drawings in this book are clear, I suppose they serve their purpose. As with all things in this sport, everyone's input is important, and pilot input regarding this manual can only help to make future editions a superior product.

A little warning before you read on...

As you already know, by the time you're learning to tow, hang gliding is generally a very safe sport, but can, in some cases, be very, very dangerous! As with any kind of instruction, this manual serves only as a guide to learning safe towing practices. Unfortunately, there is no way to predict all possible events or situations, so there is no way teach all of them in any one manual. Use this writing only as a part of your towing instruction, and be sure to seek professional help before attempting to tow. Instructors, other pilots and your own experiences and knowledge will be required to help you succeed and keep you safe.

Anyway, if you can learn the lessons contained in the pages that follow, take the time to practice, soak up knowledge from your instructors and fellow pilots and always fly safely, you'll soon be stepping your way to cloudbase and enjoying a freedom few people ever discover. Up is good!

See you in the Blue Room...

INTRODUCTION

Whether you've just finished your beginner course on the training hill or spent the last five years running off of giant mountains as spectators gasp in awe, you're eventually going to run into some evil flatlands or mountain sites with wholly uncooperative winds. In either case it becomes sickenly hard to get into the air and that, as you well know, isn't for the birds. Fortunately there is another solution: the wonderful art of towing.

To the foot launch fanatic, towing is virtually a portable mountain. Whether it's stationary winch, aero towing, payout winch or any other style, towing will get you into the air whenever you can't run into it! For the new student, it provides a super fast way to gain air time and skills. For the seasoned pilot it provides a variety of new experiences and ways to get to cloud base. For the competition sky dog and world record hound it offers new and varied venues. For tandem pilots and instructors it offers quick turnaround and flexibility. For all pilots, it provides a far greater freedom to do what we want to do most - FLY!

Towing has been evolving since a time before hill flying had begun and has developed in a number of different directions. In fact there are so many different ways to tow now that you can, to some extent, rediscover flying over and over again without ever being grounded. This manual will provide a brief history and discussion on the various kinds of towing available and how they came to be. The focus however, will be to describe, in detail, how to step tow using a stationary winch system. It covers many aspects of this particular type of towing including related tidbits such as radio operation and rope retrieval. At the end of the manual there is a set of test questions which you should be able to answer with a little reading and a little thinking. Once you understand what's covered in these pages, you'll be almost ready to step yourself to cloud base!

THE HISTORY OF TOWING

Contrary to popular belief, towing actually pre-dates foot launch in the hang gliding world. In its rawest form, it appeared in Australia through Moyes and Dickensen in 1962 and showed up here in the form of boat towing in 1968. In these early days the glider was pulled with the rope connected directly to the base bar which, as you'll learn later, resulted in huge lockout potential. Eventually the rope attachment was modified to connect to a bridle with releases at the top and bottom of the A-frame. This helped but certainly wasn't the future.

1976: The Hewitt Skyting Bridle was created. This new bridle hooked to the keel six inches in front of the centre of gravity (CG) and to the pilot. It instituted a light form of weak link.

1978: The use of three ring releases (from parachuting) began.

1981: Centre of mass aero towing begins using Trikes from France.

1984: Forburger's ATOL platform launch system was produced. It incorporated a payout winch with centre of mass towing. The glider would be mounted on the vehicle. This made tandem flying much easier.

1986: Three-string releases were implemented to avoid taking metal into the air unnecessarily.

1987: Greg Dewolf's Fly America Team flew from L.A. to North Carolina using successive tow launches.

1990: Stationary winch and step towing made it here to North America from Europe.

1992: Aero towing reaches new heights and levels of safety with the aid of new ultralight tugs, designed specifically for towing hang gliders.

With the continuing advances in towing, it is likely to become the future of our sport in many ways. Most of the world records for distance recorded in both hang gliding and paragliding over the recent past began with, or were initiated with tow launches.

EQUIPMENT

OK, let's get to the point. Enough about the past and the general state of affairs in the world. It's time to focus on how you're going to get in the air, because really, that's what this is all about. The first thing you need to become familiar with is the additional pieces of equipment used to get you in the air when towing. There aren't that many, but you need to know at least a little about each one before you can tow successfully.

The Winch

For stationary winch towing, the winch is basically just that - stationary. It may be on a trailer, it may be on the back of a pick-up truck, it may be attached to a NASA implemented retaining device, bolted to a cement block in the ground, or just about anywhere else you can imagine. The point is, once ready for towing (and during towing), the winch stays exactly where it is and pulls a glider into the air using a rather long length of line. Specifics about the winch aren't really important to the pilot as long as it is reliably designed and operated.

The Line

The line we use for towing is called Spectra. It is thin, light, hollow-braided line that is designed to withstand 1500-1800 pounds of tension (more than enough to pull a glider and pilot into the air). The drum on the winch usually has between 4000 and 7000 feet of line on it, but the line is never attached just in case a pilot inadvertently pulls all of it off. We call the combination of the line and the drum the "spool."

The Bridle

The line stretches from the drum on the winch to the glider/pilot. It is not attached to the drum, but is attached (indirectly) to a bridle which is, in turn, connected to the pilot via his release. We use a two stage release which requires two different ends on one length of rope and, as we have only one line coming from the winch, the bridle provides the split. It is little more than a piece of heavy rope, knotted off-centre by about 18 to 24 inches so that each end of it can be attached to a different part of the release and the "centre" attached to the line. Because the knot is off centre, the result is one of the two ropes reaching the glider being longer than the other. This is very important but will be discussed in a later section. Both of the ends will have a piece of thinner rope on the end, tied in a loop, which are connected to the release. The bridle is connected to the Spectra line with the use of a carabiner and the "weak link". This particular bridle is specifically for hang gliders. For paragliders, a simpler release setup requires only a straight length of heavy line for a bridle.

The Weak Link

The weak link, which is light mason twine or leech line, looks like thin, useless string in comparison to the Spectra line and the rope of the bridle, but it serves a special purpose and is extremely important when towing. As the name implies, it is the weakest part of the connection between the glider and the winch. It's there to be broken, if it needs to be. It is a safety link and it breaks quite consistently at a calibrated amount of tension to prevent over-stressing the system. The weak link will also be discussed in great detail in a future section.

The Release (Hang Gliding)

Our release basically looks like a curved metal tube with a couple of levers in the centre of it, a couple of small clips on the ends of it and a rope running through it. Three string releases can be used too, but we don't use them.

When attaching the release to your harness, attach the clips to the tow loops on the front/sides of your harness such that the levers on the front of it are to the right (all releases are right-handed), and place both ends of the rope, which should have bowline knots on them, into your main carabiner.

Each of the levers control one of two pins, one of which is spring loaded. Once the release is connected to your harness, you need to connect the bridle to the release (only after you've hooked in and done a hang check though). The lower pin should be inserted through the loop in the longer end of the bridle and into the lower release lever, while the upper pin on the release should be inserted through the loop in the short end of the bridle and then into the upper lever. The explanation of why the short rope goes on top and the long rope goes on the bottom will be explained later, but for now, just commit to memory, "long rope on bottom, short rope on top". Colour coding can help make this easier. It'll make more sense when you see the pieces. As a final note, be sure to have the two ends of the rope that goes through the release looped into your biner so that the release is technically hooked to the glider when you hook in. This ensures that the line pulls your glider, not you!

The Release (Paraliding)

A reliable two or three string release is fine. The lengths of the webbing or rope from the release to the harness 'biner must be equal though. This is important - slight differences will cause the canopy to tow crooked. There are neat limiters in some that automatically release during lockouts or hot climbs.

The Emergency 'Chute

An emergency parachute is recommended for all high flying, and required for step towing. You should attend a proper 'chute clinic to learn how to properly pack, deploy and use a 'chute. For towing however, it is important to understand that the release may be in front of your parachute, so you have to ensure that it is cleared away before you ever grab the 'chute handle and try to deploy it. You should also make sure while doing your hang check that you can fit your fist between your 'chute and the base bar.

The Line 'Chute

There is a small parachute between the end of the Spectra line and the weak link. Its job is to help control the line on its way to the ground after you've released it. In combination with the metal 'biner, it can be hazardous if the line goes slack, so be aware of its presence.

The Hook Knife

This is an almost mandatory, fail safe item for those really unusual foul ups. They are rarely of use but could save your life. The hook knife gets its name from its shape which is pretty much a handle with a hook at the end. Surprise! Inside the hook is a set of super sharp blades. The design is for catching lines, bridles, hang loops and anything else of that basic shape in the hook to make cutting it with the blade easier (as opposed to a normal knife) in emergency situations.

FIRST TOWS

Pre-Flight Inspection

Before you launch on tow, you must go through the same routines you would at the hill, plus check a few of new things.

RCR Scores

First and foremost, you should have completed both your WIND (Tow version) and WINDIVIDUAL RCRs. Sounds pushy, but we do them for a reason and you will be asked for your RCR score before the radio operator will launch you. You may be asked to explain your calculations, so it's not a good idea to randomly pick "85" out of the blue and use it. Keep in mind that you can have a large portion of the charts completed the night before or on your way to the tow field. Remember, SAFETY FIRST!

Glider Pre-Flight

Believe it or not, you can mess up your setup, even at a tow field (this is mentioned just in case there is some bizarre underground theory that pilots only forget to put pins in their base tubes when mountain launching). Always go through the same systematic pre-flight procedure after you set your glider up or after a hard landing.

Hang Check

Old faithful. This isn't some silly procedure students are taught in their introductory course that experienced pilots don't have a use for. EVERYONE does a hang check before they launch, EVERY TIME. For some reason, the odd pilot who has unintentionally forgotten to do one may not be around to explain the importance to us all. Hook in, check your lines, check your helmet, check your 'biner and set your vario before you even think about connecting the rope to your release (just in case the winch starts pulling in rope for some reason - dirt burn to the face can put a damper on after-flying partying). Also make sure that your release is at least one inch above the base tube while pushing it down with your hand.

The Line

Once you've completed your regular hang check, connect the lines from the bridle to your release. Remember to put the short line on top and the long line on the bottom (for HG). Always check the weak link to ensure it has the correct number of strands for your flight and that it isn't frayed. If it's been a while since your last flight, a practice release sequence is a good idea after hooking up the line.

Airspace

When you're towing, you launch from ground level and go up. This makes it extremely important that you check your airspace, not only for other gliders that may be coming in on approach, but for other aircraft that may violate the tow line once you launch.

Progressions

So now that you've got your pre-flights under control, it's time to talk about getting your feet off the ground. Although a pilot can be towed to 5000 feet, you don't start off that way. You see, we build to that.

Just like learning to walk or to launch off of a hill, you learn to tow from the bottom up. As a beginner, your first few tows will be at or within about five to ten feet off the ground and you may even find yourself running most of the distance (or at least a lot). Once you have displayed controlled flight at ten, you will move to maybe twenty, then fifty and so on. Until you have sufficient height, you will leave the line connected to your release for the entire flight. The main goal is to keep the glider level and pointed at the winch. Keep your eyes up and maintain a light touch on the down tubes.

Once you have displayed consistent control of the glider, you will be towed high enough to release the line and glide towards the winch, landing in front of it. Then, you'll be towed higher so that you can perform an "S approach" before landing near the winch. Eventually, you'll be towed high enough to release, fly back to launch and turn into the wind before landing near launch.

Launching

Launching on tow and launching from a hill are similar in some ways but drastically different in others. Once you have hooked in and performed your hang check, you need to attach the line to your release. Remember, long rope on the bottom, short rope on the top. For your first flights, be sure that only one of the ropes are connected and OVER THE BASE BAR.

While you are hooking in and attaching the line, give the radio operator/launch director (the person launching you) your name, glider type, RCR score and your flight plan so that he may relay this information to the winch operator (who needs to know it!) For your first tows, the INSTRUCTOR will give YOU the flight plan. It is important to always follow your flight plan, regardless of whether you're told what to do or have told someone else what you're planning to do. Of course you should always have various back-up plans laid out for use in the event of unplanned occurrences popping up during a flight.

Once all this has been accomplished, ask everyone to clear away from your glider, then pick it up and put it on your shoulders (grapevine grip) as you would for a hill launch. The only difference is that you should raise the nose of the glider slightly higher than you would on a hill. How much you should raise it is inversely proportional to how gusty the wind is. If the wind is gusty, keep the nose slightly lower to make the glider easier to control. If the wind is light, leave the nose higher. Remember that if the wind is cross, you must point the glider into the wind (crab), but still run straight towards the winch when launching. When the glider is balanced on your shoulders, you're ready for the next step - TENSION!

When you are comfortable, ask the launch director for tension. "Ready for tension please" is a nice way to do this. Once the request is radioed to the winch operator, he will take in the slack line - be ready for a tug. The tug will be followed by a constant pulling on the line, which you will be able to counter by planting your feet, one foot ahead of the other, knees bent and your back straight or leaning slightly backwards. When you are comfortable with the amount of tension (roughly as much as you can easily handle without pulling half of the muscles in your body), tell the launch director "tension is good, thank you." If you need to adjust the tension slightly, you may ask for a slight increase or decrease in tension via the radio however it is simpler to take a step back (to increase) or forward (to decrease).

With tension on, you are ready for launch. When everything feels right, ask the launch operator to check your airspace. If you are told it is "clear", you may launch whenever you are ready. To launch, shout out loudly and clearly, "CLEAR AND LAUNCH". The launch director will relay this request to the winch operator who will increase the tension on the line well beyond the point where you can hold your ground. This is where the biggest difference between hill launch and tow launch arises. Instead of running forward with long hard strides and pulling the glider behind you as you would on a hill, the idea in towing is to resist the pull of the line as much as possible with your legs, and let it pull you. Be sure to maintain a light grip with your hands to let the glider find its angle of attack. It is very important that you resist the line, rather than trying to outrun it or jump into the glider. Just resist the pull as long as you can with your legs. As you are pulled forward, keep your eyes up, take long level strides, just as you would on a hill, and be sure to keep the wings level and angle of attack at trim. Don't pull in or push out. Before you know it, you will be in the air. Once you leave the ground, pull in slightly until you reach a hundred feet.

The two most important things to remember are these: Firstly, your number one priority is to fly the glider, so concentrate on nothing but controlling it! Be sure to never give up on trying to fix any course deviations that arise and always look where you want to go. Secondly, remember the word "ABORT". If at any time you feel like the launch just isn't going right, yell out loudly and clearly, "ABORT! ABORT! ABORT!" and the radio operator will signal the winch operator to cut tension immediately. Don't be surprised if the launch director aborts your launch, even if you think everything was going well. A good launch director may see something happening that you don't, and can concentrate on deciding whether or not the launch should be aborted (considering he or she is not having to worry about flying the glider). This applies to all pilots, not just beginners. Be understanding if a launch director aborts your launch. He or she is concerned for your safety when you are launching, and it's always better to restart a launch that didn't need to be aborted than replace the broken tubes or arms that can easily result from one not being aborted when it should have been.

Flying

For your first flights, your goal is to fly straight and level towards the winch. Keep your hands lightly on the down tubes, fly at trim (or a little faster - BUT NOT MUCH!) and try to quickly correct any changes in direction that you feel happening with nudges. If you start a turn, you will need to stop it with an opposite move. You will be leaving the rope on for the first few tows and, once your instructor tells you to do so on a later flight, you will release the rope by pressing the longer of the two levers.

The whole goal on the beginning tows is to learn to tow in a straight line. You want to get comfortable with launching, and controlling the glider in the air. At this point, don't worry about your landings - just use the wheels. If you're comfortable with your flying you can try a foot landing, but it is safer to avoid worrying about that until you have some more flying under your belt.

As a rule you will have a radio with you at all times on your beginner flights. Make sure before each flight that the radio is secure and turned on to full volume. Your instructor will communicate with you whenever necessary during a flight. Always listen to what he or she is telling you and do it, UNLESS YOU ARE SURE THAT DOING SO WILL BE DANGEROUS. Try to listen and react but remember that you are ultimately responsible for your own well-being, and that either or both radios can malfunction. If what you hear sounds or seems wrong, feel free to follow the plan that seems best.

Landing

As discussed, your very first flights will leave you with the rope still attached. It is fine to just land on the wheels, or ease out the bar and run out the landing. As you get a little higher and have begun releasing the rope, you can begin trying fuller flare foot landings if you are very comfortable. The main idea is to learn to control the glider all the way to the ground and continue staying level until you stop.

Until you are ready for higher altitude flights, your flight plan will always be to take off, fly towards the winch and land along the path of the rope.

* IMPORTANT: Never ever fly without an instructor present and a radio mounted to either your glider or you until you are informed that it is OK to do so!!!

Paragliders

The basics of stationary winch towing are the same for both hang gliders and paragliders. There are, however, a few differences in the way launching and controlling are done.

The procedure for launching a paraglider is exactly the same as for a hang glider up until the point of tension, except for two things. First, paragliders do not use a metal two-stage release but instead use a two-string release (these releases can be used since transition is not required). Second, paragliders are given more tension (prior to launch) once it is requested so less slack slips into the line during the inflation.

The launch procedure differs slightly to hang gliders.

Firstly, to assist the winch operator the pilot will tell the winch operator via the launch director when he is about to inflate. This can be transmitted as "READY FOR INFLATION" or "INFLATING". At this point there will be a slight pause and the winch operator will feel the slack in the line as the pilot moves forward during the inflation. The winch operator will start bringing the rope in very slowly to help keep it from going slack at the pilot's end. However, try to keep to one side of the line if there is slack.

Once content with the tension and the conditions, you inflate the canopy. When it is inflated and stable, the winch operator and/or launch operator will assume you are ready to launch and the clear and launch will be issued and the required tension will be applied. As the pilot you may wish to give the clear and launch command although not necessary.

Under tow, much less tension should be used. Hot tows/extreme climbs are extremely hazardous. Can you spell "collapse"? This probably wouldn't happen close to the ground though.

Some precautions and notes for paraglider pilots

With tension on the line, you will find that the canopy will inflate a lot quicker than normal with the additional pulling force. Be careful to keep control through the entire inflation. A little bit of brake may be required to stop the canopy overhead but the brakes should be released immediately after. Launching with the brakes on will tip the canopy farther behind you, which is a very dangerous situation close to the ground.

It is better to steer using weight shift control, rather than using the brakes. However brakes give a more instant and direct turn. If the glider is not responding to weight shift control or if there are obstacles to avoid, then you may have to use the toggles. Be smooth, gentle and reasonably light handed with the toggles.

Stay in an upright position until you are at least fifty feet above ground. Even higher if you have minimal harness padding.

At the time of writing, there were very few paraglider pilots compared to hang glider pilots. Chances are you are going to get a hang glider pilot launching you most of the time. Be sure that the launch director is familiar with the procedures and what you expect of them.

While on tow, the canopy is going to be a lot farther back than normal. If there is a line break or weak link break there is going to be canopy surges. To help dampen these, some brake should be applied when you are swinging backward and released when you are swinging forward. It is very important that you do not mix this up the wrong way.

The recommended procedure for releasing the line is to put both toggles into one hand and reach down with the other hand to activate the release. It is important to pick the release up and physically check that the line is in fact gone. With very light tensions at the time of release, sometimes the rope stays attached.

Step towing a solo paraglider is probably one of the most challenging jobs for a winch operator. To help alleviate problems, do not fly downwind with any brakes applied. Be prepared for tangles and rope snags heading downwind and don't be upset with the winch operator if this happens.

- When step towing, the rope will be to one side of when travelling downwind. Be sure to turn back the correct way to unwind yourself.

HIGHER ALTITUDE FLIGHTS

Control Differences (HG only)

The main difference when flying on tow as opposed to in open air is that the glider is being pulled. This changes the way the glider controls in that it can add a requirement for more control input while simultaneously increasing the amount of effect that control input has. If you find the glider beginning to oscillate or yaw, chances are you are going too fast. The solution is simple - slow down. Just ease the control bar out slowly until you regain control of the glider. Be sure not to push out too far or you'll slow the glider down towards mush, or even stall, which is potentially more dangerous than going too fast. Remember, once you have reached 100+ feet, the glider should be flown at trim.

The tension from the rope will make the glider feel as if you are flying through air much rougher than you really are. Maintain a light grip on the control bar and let the glider tell you what is happening. Try to react to changes with small corrections before they have time to put you off course and necessitate larger ones, and remember: No matter what happens, fly the glider first. While on tow, it is better to move your shoulders (the tow point) rather than your hips or whole body as you would off tow. Doing the latter will often cause an over-control oscillation.

Intermediate flights

Once you have demonstrated solid towing skills as a beginner on a shorter rope, you will be towed the full length of the field and land near the winch. After this, you will have enough height to release the line and perform 'S Turns' before landing at the winch end. Next, if conditions are right and the field is long enough, you will be given enough height to release the line, fly back to launch and turn into the wind before landing. Once you have demonstrated consistent success with these flights, you'll be ready to begin transitioning (which gets you even higher!)

Transition (HG only)

For your initial flights, only a single line was attached to your release through the A-frame and above the base bar of your glider. The next step is learning to transition so you can get higher. Note that this should never be tried without the consent of an instructor. Before you perform a real transition, your instructor may have you perform one or more 'mock' transitions, using both ropes above the base bar.

To set up for a real transition, you hook in like before, but you put the longer line of the bridle UNDER the base tube while keeping the shorter line OVER the base tube. So then, commit to memory "Long rope under, short rope over." Make sure that these are never reversed. Double check this because having them reversed could put you into a serious stall! When standing at launch with tension on, have a look to ensure that the bottom rope is indeed slack under the base bar and not pulling it up at all.

What will happen is that you will launch as you have been previously, but when you get to a good height (where the top rope is close to or touching the base tube and you are at a minimum height of 200 feet), you will release ONLY the top rope. The proper procedure for executing this radical move is to place your fingers behind both levers on your release, then use your thumb to press the upper release while flying the glider at trim with your free hand. If you are pulled in and remove one hand, you will initiate a turn. Do not stop flying the glider or spend time staring at your release when attempting to do this. It only takes a second for your glider to get way off course. Practice the motion of sliding your fingers behind the levers and clicking the upper one when you're on the ground either walking around or hanging in your bird. Some pilots will slide their left hand to the centre of the bar while letting go with the right hand to maintain control and avoid initiating a turn. Others "cheat" by making a small, quick bump to the right (while keeping the wings level), before making the transition move. Either is acceptable.

The net effect of releasing the upper line and leaving the lower attached is that it changes the attitude of your glider and gives you a much higher rate of climb. It will allow you to fly right over the winch. Be aware that you will feel a jerk when you transition. This is normal.

The Dreaded Lockout

In a word, scary. Lockouts don't happen often and rarely happen to the same pilot twice (mainly because the sudden need to change your underwear that it causes is more than a little unpleasant). The result of a lockout is an incredible amount of yaw that seems almost impossible to control (trust me - been there, done that). You'll know you've locked out if the glider begins making a serious turn to one side and you feel a lot more vertical, position wise, than you normally do. You also may soon feel a new horizontal position which involves either your right or left side being on the bottom, instead of your stomach! This, if you can picture it, is the result of the glider being pointed to the right or left instead of at the winch, with its nose way above where it should be, and the rope making the glider think it is level.

If you experience anything like this, try not to panic. The main thing is to continue to fly the glider. NEVER GIVE UP! Because the lockout is exaggerated by lack of air speed (poor nose angle), rely on your old friend Mr. Speed. Pull the bar in, move to the high side and keep it in until you regain control. Get speed and immediately begin trying to get the glider out of the turn it's in and pointed back at the winch. Keep the line attached unless you stray off course by more than 45° from your original path. If you do, release the line but don't stop flying the glider. Chances are you won't be very high if you've initiated a lockout as the most common cause is early transition or too little speed during it. So, once you regain control, be prepared to land wherever your are, be it a different field, the wrong end of the right field or wherever. You won't likely have enough altitude to return to your planned landing spot, so just get control and get down safely. For a far more detailed discussion on lockouts, check out the October 1996 issue of Hang Gliding.

The Weak Link (revisited)

Once you've advanced your towing to the point where you're doing full field length tows and landing back at launch, you should be responsible for all aspects of your flight. That includes the weak link mentioned earlier. Recall that the weak link is usually mason twine or leech line connecting the bridle to the Spectra line (actually to the carabiner attached to the parachute at the end of the Spectra). The purpose of the weak link is to break if something goes wrong during the tow to increase your safety. Examples of things that can break it are surges from the winch, too much tension, a tangle in the line or a wear from use.

In order to keep the weak link doing its job, it should be replaced regularly. It's the pilot's responsibility to check the weak link before each flight. If the weak link shows any fraying or has been put through several full tension tows, replace it. Remember it is there for your safety and is extremely cheap, so don't be cheap about replacing it! Mind you, only use a six to twelve inch piece, and only to make weak links - running out at 2:00 pm in the afternoon can ruin everyone's day. Even though you can buy mason line at any hardware store, it's a little inconvenient to drop everything and go a-shoppin'.

The idea is to match the pilot and glider weight roughly to the breaking strength of the weak link. As a general rule, solo flights will use four to six strands of weak link, tandems use eight strands and beginners and paragliders use four. From that, you might pick up that weak links are generally referred to as a number of strands. Each strand represents one occurrence of the weak link traveling between the bridle and the 'biner on the Spectra. Occasionally, you might hear a pilot refer to the weak link as a number of loops. In this case, the number would be half of the number of strands, as two strands form a loop. (Obviously this can't happen on a five strand weak link.) These are general rules for the leech line we normally use. Heavier/stronger leech line may require only one, two or three strands. It's simply a matter of finding the approximate breaking strength of whatever line is available.

If you are replacing a weak link which is to contain an even number of strands, simply loop a piece of weak link line through the loop at the end of the bridle and the biner at the end of the parachute so there are enough strands between the two, and the strands are one to two inches in length. Tie the two ends of the weak link line together using a fisherman's or reef knot with a half hitch in each end.

If you are adding a odd numbered weak link, tie it to the loop in the bridle using a bowline knot, loop it through the loop and the parachute carabiner as above until the appropriate number of strands are reached, then tie the free end to the parachute carabiner with another bowline knot.

Learn to replace the weak link and remember to check it before each flight. It's much quicker to put a new weak link on than launch, have it break, land half way down the field, walk back and then put on a new one!

In the off-chance the weak link does break when you're towing, remember to fly the glider first. If you have a fair bit of altitude, the nice thing to do is grab hold of the bridle, keep it in your hand and remove it from your release. Then, fly back over launch and drop it so that another pilot can use it. An even nicer thing to do is use a little common sense and drop it near launch, not on it! Considering how much damage a penny can do when dropped from a good height, chances are that a plummeting bridle will wreck a fair amount of havoc on gliders or pilots on the ground if it happens to hit one of them.

Releasing

There isn't an awful lot to releasing. Once you get almost over the winch, simply release the line. If the winch operator thinks you've waited too long, he or she will drop tension as a signal for you to release. If there are obstacles between you and the winch (or near by), try to release the rope at a point where it can travel safely to the ground without becoming tangled in a tree or something. If there is a cross-wind, it is good to fly a little upwind before releasing.

One thing to watch out for is the glider correcting its angle of attack when you release the rope. The tension from the tow will pull the nose upwards, and the natural reaction once tension drops is for the nose to come back down to its trim position. The feeling it produces is a sudden drop forward which, if you're like me and would rather kneel on rice than deal with the first hill on a roller coaster, just isn't very enticing. To minimize this dropping, just pull in some speed right before you release, holding the control bar in the centre so that a turn is not initiated.

Approaches

Once you have launches and straight tows under your belt, you'll find that you generally have enough time to release over the winch, fly back down wind to launch and putter about a bit before landing. The best thing to do with your puttering around is begin practicing proper approach patterns.

The approaches used in towing are the same as those used in mountain or hill flying. You will normally use either the figure eight or the downwind/base/final (three-leg or aircraft) approach. As a general rule, use the downwind/base/final when winds are light and the figure eight when they are stronger. If you are making your approach when another glider is ready to launch, be sure to either perform figure eight's behind the other glider, or make a very wide three-leg behind it, setting up your final to be clear of the tow path.

It is very important, whatever approach you make, that you make it on the LZ side of any obstructions including tree lines, buildings and power lines etc. NEVER perform figure eights or base turns more than 45° beyond these obstacles in case you miss-judge or run into unexpected sink. In a similar vein, be sure not to fly through the wind shadow caused by anything in the general area and, in cases where you do fly through it, keep good speed. In short, it's best to set up your final approach near launch, and target the middle of the field as your intended landing line. Again, be sure that this line is to one side or the other of the tow path, not along it. As always, its better to be safe and far less irritating to walk an extra thirty or forty yards than be hauled out of hydro lines or scraped off the ground because you tried to deal with all of the extra nonsense you'll usually encounter if trying to land ten feet from launch. Let common sense prevail - you have a big field, make use of it!

RESERVE PARACHUTE

It is mandatory to carry a reserve parachute when step towing and recommended for higher flights of longer duration or especially flying in traffic. It is also important that you in fact know how to use it.

Parachute clinics are generally held at least annually and it is strongly recommended that you attend one. These clinics generally involve hanging in your harness in a gymnasium, being spun, and actually pulling your chute out and throwing it. The rest of the day is spent airing out your deployed chute and then repacking it in your harness. Chutes should be repacked every six months.

If you're learning to tow, or just starting to tow high then there is a good chance that you haven't had the luxury of a chute clinic yet hence these guidelines for parachute care and deployment. However the information here is in no way a substitute for a good chute clinic so you should make a note of attending the next available clinic run by your club.

Mounting

Typically, hang glider parachutes are either chest mounted or side mounted.

The most common practice in Canada and the US are chest mounted parachutes. Chest mounted parachutes are mounted on the chest (imagine that) and are secured in the parachute container by velcro and locking pins. They have the following advantages and disadvantages:

Advantages:

The deployment handle can be easily reached with either hand.

They are safer in general as they offer chest protection (in an undeployed state) in case of a hard impact. Lives have been saved by the "cushion factor" that they give.

The velcro minimizes the chances of an accidental deployment.

Disadvantages:

The two-stage tow release sometimes obstructs the successful deployment and thus has to be moved out of the way. If the tow rope is still attached then it may be necessary to release the tow rope to allow the release to be moved out of the way. This slows down deployment time.

Velcro makes it more difficult to deploy. Ie. Has to be torn away correctly to release.

Sometimes causes discomfort having that much bulk right in front of you.

A practice that is a lot more common in New Zealand and Australia is the use of side mounted chutes. These chutes are used on pod harnesses only and generally mounted on the right hand side between the armpit and the waist. They are only secured by the locking pins.

Advantages:

- Easy deployment. As soon as the locking pins are pulled you have your chute in your hand.
- No obstructions by tow release or base bar.
- Some pilots enjoy not having the bulk of the parachute in front of them.

Disadvantages:

- Increased risk of accidental deployment. Locking pins have to be inspected closely before each flight as these are the only things holding your parachute in.

- Offers no protection to chest in case of hard impact.

- Often difficult to reach with opposite hand.

PREFLIGHT

Deploying a brick on a string or having an accidental deployment will ruin your day. Before you launch with a parachute there are some things you should check.

Bridle. The bridle normally runs up the harness mains and is attached to the carabiner. Ensure that it is indeed attached to the carabiner, otherwise it is useless.

Pins. Ensure that the locking pins are in place and secure. This is extremely important for side mounted parachutes.

Velcro (chest mounted chutes). Ensure that the velcro is in place and the chute is secure.

DEPLOYMENT

The chances of having to deploy are rare assuming you fly with some common sense and respect. The most common use of reserve parachute deployments in hang gliding are mid-air collisions and failed or badly executed aerobatics.

Reserve chutes are designed to bring you and your glider down and to save your life. Do not be fooled into thinking that you're combining skydiving with hang gliding. The glider will be brought down but will not necessarily be damage free. You will be alive but there is a good chance that you will be hurting or break something. Don't deploy unless you really have to.

Chances are you will know when it is time to deploy. You should deploy if your airframe fails or if you lose complete control of your aircraft without any hope of recovery (a tumble for instance). Once you've made the decision to deploy:

- Look at your deployment handle.

- If you have a chest mounted parachute then you will need to lift the tow release to get it out of the way.

- Grab your handle with both hands if possible.

- Pull your deployment bag free and the locking pins will break free. With a chest mounted parachute it means extending your arms fully down away from your chest to break the velcro. When it comes free you will be holding the bag that contains your parachute.

- Look for clean air and throw your parachute. Try and throw it in the direction you are spinning (chances are you will be spinning) and downwards.

- Grab the bridle if you can (without wrapping it around your arm) and yank it to help pull the parachute out of the deployment bag. If it doesn't come free then pull it in towards you with strong yanking motions.

- Let go of the bridle once the chute is open and try and climb into the A-frame.

- Locate your hook knife. Don't let go of the glider - just be prepared to use it.

- Once you hit the ground try and collapse the parachute. If you end up getting dragged it may be necessary to cut free of the chute with your hook knife.

SWIVELS

Swivels are a device that enables the broken glider to spin without wrapping up the bridle and eventually closing the parachute. If you do not have one it may be an idea to get a swivel kit or upgrade to a newer more reliable, slower descending parachute that comes equipped with a swivel.

MODERN PARACHUTES

Modern parachutes are often of the pull down apex style which offer a slower descent with reliable opening. If you have an older parachute you may want to consider upgrading.
User avatar
Tad Eareckson
Posts: 9161
Joined: 2010/11/25 03:48:55 UTC

Re: instructors and other qualified pilot fiends

Post by Tad Eareckson »

http://www.docstoc.com/docs/112851827/More-Tension-Brian-Fotheringham-Michael-Robertson-Leslie-Peter-Darian
MORE TENSION - Brian Fotheringham / Michael Robertson
STEP TOWING

In a Nutshell

Step towing is how we get really high without the use of grey matter destroying substances. The main idea is that instead of flying over the winch and releasing the line, you fly over the winch, keep it attached, fly back downwind to launch, turn back towards the winch and get hauled up even higher. The stepping term stems from the idea that on each successive tow towards the winch, you will start from a higher altitude and finish at an even higher altitude.

Step towing can be done very safely, but can be extremely dangerous for a pilot who has not developed the consistency and control required to perform it. Each pilot is different, but most people are not ready to attempt a step until they have had roughly thirty full field tows. NEVER TRY A STEP UNTIL YOUR INSTRUCTOR HAS AUTHORIZED IT!

Because of the danger involved with stepping and the extra height that can be attained, no pilot is permitted to perform a step unless he or she is wearing an emergency parachute and has an altimeter attached to the glider.

The step can be broken into four phases: The upwind flight (what you've learned up 'till now), the upwind turn, the downwind flight and the downwind turn. We'll look at each of these in turn.

Upwind Turn

The upwind turn is performed, as the name suggests, upwind (i.e. over the winch). Fly straight over the winch as you normally would. When you get to about where you would release (about a 15° angle between you and the winch or when your climb rate decreases to under 100 feet/min.), perform a quick, coordinated, sharp turn to either the left or the right and head downwind. If you feel tension drop on the line before you have turned, the winch operator is signaling you to make your turn immediately. If there is a crosswind, turn in the direction that will have you traveling downwind quickest unless ground obstacles, which could snag the rope, make this a dangerous option.

Exactly how sharp your turn is does not matter too much, except that the quicker and more coordinated the turn, the less height you are likely to lose in the process and, in case you haven't figured it out yet, staying up is a good thing.

Because the idea of a step is to fly back downwind, turn around and head back to the winch, you must have a certain amount of height attained over the winch before you can attempt a step. How much height you need depends on both the weather conditions and the type of glider you are flying. As a bare minimum, never make an upwind turn if you are not at least 750 feet over the winch. If you are below this height, release the line and fly back to launch. You should try a couple of these turns without the rope as practice before attempting a real step, assuming that you have 500 feet left while over launch.

Downwind Flight

Once you have turned over the winch, begin flying back towards launch or straight downwind (if the winds above are different from those on the ground). Just be sure not to choose a path that leads the line directly into a forest or some other line tangling agent right beside the winch. Head downwind with just a little bit of speed.

As you head downwind, the winch operator will feed line out so that there is no tension on you. Looking back at the rope will give you an indication of which way the wind is blowing and whether or not you're flying straight downwind, as will any crab angle required to stay straight. If you are flying straight downwind, the rope should be straight behind you. Note though, that it's not crucial to travel directly downwind. It's the most effective flight path, but not always the safest if you take into account obstructions, major roads and so on.

Obviously there comes a point where you have to stop flying downwind and turn back upwind, towards the winch. The timing for this is open, but there are two simple rules:

1) Never, under any circumstances, allow yourself to drop below 500 feet before beginning your downwind turn. In fact, you should start your turn at a minimum of 550 feet so you still have about 500 feet left after you've completed it.

2) On the first downwind turn of any flight, don't fly behind launch, EVEN IF YOU ARE ABOVE 500 feet!!!

If you are traveling further downwind than the winch operator would like or you are pulling out too much line, he or she will signal you by jerking the line two or three times. If you feel any obvious (or even not so obvious) jerks, begin your downwind turn immediately, regardless of where or how high you are.

Downwind Turn

The downwind turn is what makes step towing as dangerous as it is. The danger comes from the rope being attached to the glider via you, which puts the line behind you, coming from the centre of your glider and at the same height as your glider. You have to be extremely careful that when you make your turn, the inside wing does not drop underneath the line floating in the air. To this end, there is a specific set of instructions for making these turns.

Firstly, always make the downwind turn to the left. The reason for this is that the levers on the release are always on the right side of the release. As the line is attached to the release and pulling on it, turning to the right could accidentally allow the line to wrap around the levers and make it impossible to activate the release. This is one great reason for investing in a hook knife!

The left turn should begin with a 45° bank 'til you're flying crosswind, then follow with a shallow bank until you're wing clears the line and be completed crisply 'til you're pointed at the line (not at the winch). Practice making wider, flatter turns than normal before you try your first downwind turn so you develop a feeling for turning without dropping the inner wing a great deal. As soon as you begin the turn, get a fix on the line you have started turning towards and don't let it out of your sight. Make sure that the left wing tip does not drop underneath the line. If it does, either turn back downwind or release immediately! Once you begin the turn, the winch operator will stop feeding out line and will, instead, begin slowing the travel of the rope by braking the winch. He or she will re-instate the tension once you have completed your turn, so you want to be absolutely sure that the rope is under your left wing, not over it, or you will likely be flipped when tension is restored.

This sounds dangerous, and can be - but not when done correctly. When you make the turn, be sure to continue it until your glider is pointed at the line, not at the winch. This means turning further than you would expect to as you have a bow in the line. If you are pointed at the winch when tension is restored, the tension will technically be coming from the side, not the centre, and could cause a lockout.

The heavy section of rope on the end of line, between the Spectra line and the line chute is for step towing. It is heavier line which helps keep it lower during the turn and it is more visible for yourself and often the winch operator.

Once you have completed the turn, the winch operator will increase tension enough to take the slack out of the line and, once this is done, increase tension back to normal tow levels. Continue to watch the line as you see the slack being pulled in. If you have safety wheels on your glider (as all pilots should have), you may notice the rope bounce under your left wheel and away from the control bar. There's no need to panic when this occurs. Simply reach out with your left hand and push the line back under your wheel to where it should be, or quickly push the left wheel up and over the line. Be careful though when using the second method - you don't want to push the out too far and loose all of your airspeed (stall city).

When tension is restored, you will feel a surge not unlike the type you feel when launching in a jet plane. This occurs because you get the most height out of your tow at this stage. Pull in slightly until the climb stabilizes, then go to trim and enjoy it. If you see the slack being taken out of the rope really quickly, take some speed until you get the initial surge of the first pull and then ease back to trim.

Second & Subsequent Turns

Each of your upwind turns should be made when the angle between you and the winch is about 15° which means you will be a little further from it each time you start the turn. Similarly, all downwind turns should be initiated at a similar angle to the ground as your first, so the net effect is that you begin your turn at a higher altitude each time. This pattern is shown in the diagram.

If the winds are high (stronger than 15 mph), it is a waste of time flying up over the winch. Make your steps shorter by turning sooner than you normally would on both the upwind and downwind turns. You want to release in a thermal while traveling upwind, so mark them when you're traveling downwind, but don't release or you'll cause a nasty tangling of the line on the winch.

Things to Watch Out For

There are a couple of things that may happen when you are step towing that you need to be aware of and know how to react to. These are both associated with the line. The first, and more common event is having the line break. This can occur for a number of reasons. You'll know if the line has broken in one of two ways: either the tension you have will disappear, or the tension you're waiting for after making your downwind turn will never appear. In either case, you should immediately grab the bridle with your hand, then detach it from your release. The goal here is to keep the line, but not have it attached to you or the glider in any way. Be sure not to wrap it around your hand, just hold onto it (so you can let go of it if it gets caught on something). This also applies if you inadvertently pull the entire line off of the drum. In either case, you are responsible for the line and, as Spectra is rather expensive, it's a good idea to bring it back.

You should then pull in some speed and head towards the winch with the line in hand. If possible, fly all the way to the winch and then let go of the line. Cut this distance short depending on your altitude. Remember that you need to set up an approach and land safely, so leave yourself enough height to perform this task.

The other, less common and far scarier thing you must be ready for when flying downwind, is a tangle in the line. You'll know when this happens because you'll be stopped dead in your tracks (can you say nose dive?). With luck, the weak link will break and you suffer little more than an abrupt jerk. If it doesn't, you'll find yourself heading towards the ground in a diving motion. If this happens, release the line immediately and DO NOT PUSH OUT! Instead, pull in to gain speed and prevent a whip stall or loop and then gradually allow the glider to return to trim. If the line becomes tangled when you are flying upwind, you'll simply notice that you have lost tension. Just release and enjoy your flight or set up a safe approach and land, depending on your height. Just keep an eye on the line 'chute - you really don't want to tangle with it.

Releasing

By the time you are ready to step, you are likely also playing with thermals when you find them. You can release at any point during an upwind leg of a step but, for your best chance of staying up, release when you find yourself in a thermal lasting two to three seconds or more if you are a thousand feet or higher. The reason for this is that a decent thermal will get you higher faster than your average tow, and sucking an extra 400 feet out of a tow may result in you never finding the thermal you just flew through that could have taken you to cloud base.

One very important note about releasing when you're stepping is that you should always do it when traveling upwind. Unless the line gets tangled, always turn upwind before releasing so that the winch operator can reapply tension. If the line is released without tension on it, it virtually always creates a tangled mess at the winch. Safety, of course, overrules this law.

Making Friends (or Enemies)

Gliders pilots, as you already know, are usually pretty easy to get along with. However, keep in mind that all pilots have the same interest you have - air time! Keep the number of steps you take to about two or three if there are a large number of pilots present and three or four if the number is small or moderate. If there's just you and some guy named Wambatsu taking turns, go for all you can handle - just clear it with Wambatsu and the winch operator first. This sharing of the line concept really comes into play at the end of the day when the air glasses off and the sun begins to set. Everyone wants that one last flight so, at the end of the day, keep it to 1 step or even think about just towing over the winch and releasing.

Rest assured that if you consistently take five steps on every flight and hog the entire glass off with some gargantuan tow, you'll soon find it hard to find a launch director willing to get you into the air. It's truly amazing how many pilot's can suffer from worn-out-radio-button-thumb-disease flare ups at the same time!

DOLLY LAUNCHES

Not all launches are performed standing up. In many cases, tandems especially, a pilot may choose to use a dolly to launch in the prone position. The dolly is basically a horizontal A-frame with two wheels on the front and one on the back. The front wheels can swivel while the rear is fixed in place. Above the front wheels is a cradle into which the base tube of the glider is placed. A tall support extends from above the rear wheel to support the keel of the glider. Beneath the cradle there is a rope traveling across the front of the dolly.

There are a few different checks you must make before you've hooked in and are ready to launch by dolly. Make sure when you place the keel of the glider on the back rest of the dolly that it has total freedom to move (i.e. make sure there is nothing for it to catch on). The base tube should rest snugly in the cradle and the attitude of the glider should be nose high. Be sure to line the glider and dolly up so that they are pointing straight at the winch or slightly into the wind if there is a significant cross. Make sure that the front wheels are straight and that all three wheels are inflated.

Once you've hooked in, perform a hang check as usual (well, OK, it's a little different considering you're already hanging and will continue to do so right through launch, but check your straps, carabiner, helmet, vario, release and so on as you normally would). Always double check that the bridle ropes are around the right way (more difficult to detect lying prone) and the long line of the bridle is beneath the base bar, but not under the dolly bar (otherwise you'll be taking the dolly on a scenic tour). Also be careful to ensure that your harness and all of its lines are clear of the dolly. In short, make sure the dolly is not connected to anything and that it is not going to accidentally become connected to something during launch.

Once you're ready for tension, reach down and grab hold of the rope sling at the front of the dolly. Continue to hold this rope against the base tube until you're flying (the rope is there to keep the glider on the dolly). If there's a crosswind, prepare for it by pulling to the upwind side and 'fly' the glider on the dolly until you're in the air. You need to keep extra speed when dolly launching, so remain pulled in at least two inches past trim until you leave the ground.

Once the launch begins, keep your speed and keep holding the rope against the base tube. As you begin to lift into the air, release the dolly by letting go of the rope and letting the glider out to trim. It's a good idea to release the dolly soon after leaving the ground - it gets heavy kinda quick and besides, other people might want to use it, so you shouldn't keep it for your whole flight, especially if you're planning on doing some XC. Also, Mr. Dolly will have a better day, and last a good deal longer, if he isn't dropped from more than a few feet. Once you are totally clear of the dolly, pull in again immediately until you reach about a hundred feet, then return to trim.

One thing to watch out for is that the dolly will tend to roll downhill if you're launching on unlevel ground. Only pilots who have developed solid flying skills should tackle a dolly launch, and regardless of skill level, the first couple of attempts should be made in good conditions. The first dolly launch can be intimidating, but once you're comfortable you may come to love them, especially in gusty or crosswind conditions, and with higher performance wings.

RADIO OPERATION

Although we have a variety of manual signals used for launching and so on, most of the communication we do is through the use of two way radios. The use of these radios must be taken seriously, and the radios should not be treated as toys, nor the airwaves as a medium for auditioning for Yuk-Yuk's.

Commands

So that everyone understands exactly what is happening at all times, and to maintain a high level of safety, there is a certain set of commands used for launching gliders. Don't make up your own language even if you think it makes more sense, because it won't to anyone else who is expecting to hear the normal statements. Before each flight, the radio should be used to communicate the following information to the winch operator who must log it:

- pilot name
- glider type
- pilot's RCR score
- type of launch (foot or dolly)
- number of strands in the weak link
- pilot's flight plan (simply stepping or no stepping for advanced pilots)
- approximate time until tension will be requested

The conversation might go something like:

"Hello Dave. Wambatsu is up next on his 165 Spectrum. He will be doing a foot launch on four strands. RCR score is 83. He will be stepping. He's doing his hang check and will be ready for tension in about two minutes."

Following this, a routine set of commands should be passed to the winch operator. The pilot should issue the first five of these commands "as-is" to the radio operator who should in turn relay them exactly to the winch operator. The commands used are as follows:

- "READY FOR TENSION PLEASE" - when the pilot is ready for initial tension

- "MORE/LESS TENSION PLEASE" - when the pilot wants more or less tension

- "TENSION IS GOOD - THANK YOU" - when the pilot is happy with the tension

- "CLEAR & LAUNCH, CLEAR & LAUNCH" - when the pilot is ready for launch

- "ABORT! ABORT! ABORT!" - when the pilot AND/OR the radio operator thinks the launch should be aborted. Continue yelling "ABORT!" until the winch operator has dropped tension.

- "TRANSITION COMPLETE" - when the pilot has transitioned

If at any time during the launch there is information that the winch operator should know (such as the pilot waiting for a crosswind to pass after tension has been applied), this information should be conveyed to him or her in a clear and concise manor.

It is crucial that you never issue any TENSION or CLEAR & LAUNCH commands to the winch operator unless the pilot has specifically given them to you. Issuing either of these without having received them could result it serious injury because the pilot will not be ready for the sudden pull of the line. You should also stay focused on the launch when you are acting as launch director. Don't get involved in other issues happening around the launch unless it is important that you do so, and never wander off in the middle of directing a launch without first informing the pilot, especially if you are holding the glider by its nose wires or weighting down the glider by holding down the base tube to aid the pilot.

Do's & Don'ts

- DO treat the radios and airwaves with respect.

- DO speak clearly into the radio.

- DO give the winch operator fair warning about tension requests and crosswind wait-outs etc. (i.e. don't ask for ten;sion out of the blue and expect it instantly).

- DO put the radios back in the clubhouse/office/radio box at the end of the day.

- DO ask to have a radio attached to your glider or harness if you are more comfortable having an instructor talking to you.

- DON'T treat the radio like the walkie-talkies you had as a kid.

- DON'T use the radios for irrelevant, non-flying related chit-chat.

- DON'T yell into the radio as the winch operator is sometimes wearing headphones and generally isn't on a hell-bent mission to go deaf.

- DON'T try an have a conversation with the winch operator while he is towing someone, unless it is important to the flight at hand.

- DON'T leave radios on car hoods or roofs, your harness as you're hooking in or anywhere else where it might disappear. The accessory box on the ATV is a good place if not you are not sure.

- DON'T use the radio while an instructor is communicating with a student in the air with another one.

- Don't issue TENSION or CLEAR & LAUNCH commands unless you have received them from the pilot.

Being a Good Launch Operator

Once you have done enough tows and have developed reasonable tow skills, you can begin helping other pilots by acting as launch director for them. The job should not be taken lightly, and you should try to do each of the following every time you are launching someone.

- Confirm that the pilot has the skill level to fly in the current conditions.

- Remind the pilot to perform a proper hang check and assist him in doing so.

- Ask spectators, etc. to clear the glider's path while the pilot is readying himself.

- Radio all relevant information (mentioned above) to the winch operator in advance.

- Relay the pilot's requests to the winch operator immediately after receiving them.

- Advise the pilot of any changing conditions that he or she may not be aware of.

- Watch the launch carefully and abort it if the pilot gets into trouble - that means any pilot, not just a student! Even if you are launching the Overlord Hang Gliding Champion of the Earth Realm and he or she appears to be in trouble, you should abort the launch and risk possibly having to later deal with an ego-maniac who will question your judgment. Safety first.

- Let the winch operator know when transition has occurred.

ROPE RETRIEVAL

Well, as the rope is at the winch and launch is at the other end of the field, it has to be pulled from the winch for each flight. As a general rule, whoever is available should go get the rope for whoever is ready to fly. What we use to retrieve the rope can be anything from a three-wheeler to a Ski-Doo, a jeep or a Roman chariot. It doesn't really matter, as long as a few simple rules are followed.

Procedures

Whoever is retrieving the rope should drive the retrieval vehicle (rv) to the winch, before the current pilot has released it. This makes the day flow a little faster. Never drive under the rope while it's in the air - Spectra line can cut you in half if it catches you and can be near the ground when a pilot is flying downwind while step towing.

Wait behind or beside the winch until the line has been reeled in, then pull in front of it and attach it to the rv. Turn and face the winch operator and wait for a single to begin driving back to launch. When you get the signal, accelerate slowly and smoothly towards the launch area. You must drive in a straight line between the winch and the launch spot. Do not weave or make turns when you are dragging the rope, and be sure to always accelerate and decelerate slowly and smoothly. Driving fairly quickly is OK, but don't go insane and try for any land speed records. When you get to the launch area, unhook the line from the rv and drive away carefully.

If you are ever using the rv to retrieve another pilot and his glider, be sure to drive slowly to ensure that Mr. Glider doesn't get caught in a rut or blown by a gust and end up careening into the ground with fiery enthusiasm - that wouldn't be good.

Safety Rules

1) Wear a helmet
2) Drive responsibly
3) No pets or children on the rv
4) Always keep your eye on the line while it is in the air

Do's & Don'ts

- DO treat the rv with respect
- DO drive safely
- DO take a turn at rope retrieval once in a while
- DO drive as smoothly as possible when towing the rope
- DO accellerate/decellerate slowly and smoothly

- DON'T treat the rv as a toy or a carnival ride
- DON'T deviate from a straight line path between the winch and the launch spot when towing the rope
- DON'T begin pulling the rope before the winch operator signals you to
- DON'T do anything illegal with the rv such as drive on roads where it is not permitted

Another important note: The ATV's are equipped with a parking brake. DO NOT DRIVE WITH THE PARKING BRAKE ON. If it feels like the brakes are on, stop and ask someone where the parking brake control is.

SIGNALS

As we don't always have the luxury of using two-way radios, we have alternate methods for communication between launch and the winch: Flag signals and nose dip signals. There are also a series of signals that can be passed between the pilot and the winch operator during the tow.

Flag Signals

These still involve the use of a launch director (it's a wee bit hard to wave a flag when you're trying to launch, especially in a 45° crosswind blowing at 20 mph). The signals equate on a one to one basis with radio commands and should be relayed to the launch director by the pilot as they would be if radios were being used.

- TENSION PLEASE - Wave flag overhead.
- TENSION IS GOOD - Stop waving flag and hold it still overhead.
- CLEAR & LAUNCH - Drop flag (like in a drag race).
- ABORT - Wave flag overhead in a frantic motion.

Nose Dip Signals

When neither flags nor radios are available, the pilot can signal the winch operator directly with glider movements. Considering that the operator is specifically watching the glider for certain movements, be sure not to inadvertently perform these signals lest you be pulled along the dirt without your glider or something else along those lines.

- TENSION PLEASE - Dip the nose of the glider down to the ground and back up (first dip).
- TENSION IS GOOD - Dip the nose of the glider down to the ground and back up (seconnd dip).
- CLEAR & LAUNCH - Dip the nose of the glider down to the ground and back up (third dip).

Be sure lower your right leg (left leg forward) when bending to dip the glider so that you don't accidentally engage the release.

In-Flight Signals

There are a few signals that the pilot can give to the winch operator:
- Legs spread - Increase tension.
- Scissors motion with legs or rapid glider oscillation - Decrease tension.
- Turn back downwind on downwind turn - Do not restore tension.

Conversely, there are a few signals the winch operator can give the pilot.
- Jerks on a downwind tow - Turn back upwind immediately.
- Drop tension on upwind tow (over winch) - Turn downwind (or drop rope if appropriate).
- Drop tension on upwind tow (way before winch) - Release (might be an aircraft on intercept).
- Strobe Light Turned Off - Release immediately.

SUMMARY

Equipment

- Rope - Be aware of where rope is at all times. It is VERY strong and can cut steel.
- Bridle - Special design for two-stage release for HG, straight line for PG.
- Weak Link - Check it carefully
-- four strands - HG beginner or PG solo
-- six or four strands solo HG
-- eight strands tandem HG
-- six strands for tandem PG
- Releases - Minimum one inch clearance between release and basebar during hang check
- Radios - be qualified to operate as launch director

Pre-launch

- Do RCR's (start evening before, or on way to field). Continue to watch conditions throughout the day. Do not assume that it is okay to fly because your instructor hasn't cut you off yet.

- Setup and preflight of Glider (wheels HG, clear lines PG), harness, helmet and release.

- Hook in to Glider FIRST!

- Hang check (HG).

- Check two or three-string and that it is centred (PG).

- Hook up tow bridle (see note for Students on last page). If transitioning, place long rope under basetube, to long lever on bottom of tow release, and short rope over basetube, to short lever on tope of release. (Long rope bottom, short rope top). (HG)

- Review flight plan and backup flight plan.

Launch Procedures

- Place one foot in front of other, good supportive stance.

- Radio "May we have some tension please?"

- Radio "Good tension, Thank you."

- Ensure bottom rope is not pulling up on basebar. If it is, let someone else go and get yourself a different bridle.

- Breathe and visualize light grip, eyes up and forward, launch, flight and landing.

- Check WINGS BALANCED, level, good control, good conditions, and the all important hook-in double check. Yaw and point into crosswind if appropriate.

- CHECK AIRSPACE!

- Radio "Clear & Launch, Clear & Launch"

- Gently resist towline, keeping some tension on, while beginning to accelerate. Long Strides

- Pitch and roll control will be required if one wing lifts.

- Yell "Abort, Abort, Abort" if anything is beyond your liking, such as sudden gust or tripping. Launch director will relay the abort in same manner. Tension will be dropped.

- Launch director may Abort you even if you felt everything was O.K. (A conservative abort is WAY BETTER than none when needed).

- As glider lifts, keep it flying and wait for IT to pick YOU up off ground, rather than jumping into it too early. (Extra step in air).

Flying on tow

- Relax and keep eyes forward. Look at the winch.

- Keep glider flying straight towards winch or rope. ("Follow the rope"). This will require slightly less roll than normal. Bump and back, not long corrections. Move your shoulders (tow point) rather than your entire body (HG). Weightshift before brakes (PG).

- If glider gets severely off-line, it will require much more speed and roll correction than normal. Never give up. Release past 45° off-line.

- Be sure to watch your Target. (Look where you want to go, for you go where you are looking.) Keep some speed, but NOT too much, during first fifty feet of climb.

- Experienced pilots may switch to prone after launch is complete and glider is stable in flight preferably above thirty feet.

- Watch top rope (intermediate tow students or experienced pilots) until it starts to touch base bar, then transition to bottom rope (min. 200 feet).

- Fly up over the winch to about a 15° rope angle (or until climb rate diminishes to less than 100 feet per minute). Waving legs = less tension. Legs held apart = more tension.

- Release tow rope if not stepping.

- Upwind turn on step can be in either direction and should be quick and coordinated. Avoid dragging rope into obstacles on ground.

- Pull in slightly and travel as straight downwind as possible with some speed.

- Downwind turn starts with a 45° bank, followed by a level turn past the line and finished crisply until pointing at the line.

- Release upwind in any good thermal lasting at least two seconds. Signal before release (PG).

- Enjoy flight, get upright early (HG) and plan landing approach early to avoid last-minute scary approaches (over obstacles, in wind shadows, over launching pilots, etc.).

- Enjoy flight, get upright early (HG) and plan landing approach early to avoid last-minute scary approaches (over obstacles, in wind shadows, over launching pilots, etc.)

Rope Retrieval

- When you are not flying, help other pilots by learning to operate Retrieval Vehicle (rv). Get checked out on it. Please wear a helmet. (ATV's can be far more dangerous than flying.)

- Keep your feet on the pegs, never put them on the ground while riding.

- When riding to the winch, keep a safe distance from rope (rope sags to ground near winch during stepping).

- Wait for rope - at winch end, and BEHIND the winch!

- Hook up rope to rv.

- Look for winch operator signal to start pulling out rope. Accelerate and decelerate smoothly.

- Keep your eyes on the target (tree, glider etc.), and go in as straight a line as possible. You may go quickly, but try to keep speed constant after initial hundred feet acceleration.

- Come to stop SLOWLY! (Stopping fast usually creates a time-wasting and frustrating tangle.)

- Unhook towline and drop it straight behind you.

- Remove rv from launch path.

Unusual Situations and Emergency Procedures

- Hard landings - (HG) be sure to assume "crash" position - relax, bring arms INTO body by letting go, harness will keep you up. Tuck and roll prevents strains and other more severe injuries. (PG) Do a parchute landing roll.

- Early releases and weak link failures - let glider get some airspeed but not too much (trim position or one inch faster) Look for clear landing area.

- Line tangles - covered in detail in Tow Manual

- Rope breaks - see Tow Manual

- Parachute deployments - see Tow Manual

Student Notes

- Do not allow anyone but your instructor to instruct you unless you have your instructor's permission. Beware of advice from a well meaning person nicknamed 'Crash'.

- Until instructed otherwise, always put both ropes OVER the basetube when hooking up tow bridle. (HG)

- Stay in upright position on downtubes until instructed otherwise.

- Be sure you have a radio mounted until your instructor and you agree you don't need one.

- FLY ONLY under the guidance of an instructor until you graduate from the tow course. If you are in doubt as to who is a qualified instructor, ASK!

- Concentrate on quality technique rather than just getting airtime. The airtime will come far quicker if quality technique is practiced. You have your whole life to fly. Modify RCRs as conditions change.

- Please call to book a morning or evening, in advance, then check the answering machine before you leave to be sure there are no last minute cancellations. Leave a message to say that you're coming.

TOW SAVVY TEST

* NOTE: Only hang glider pilots need answer the questions designated by ''.

01. Lockouts
(a) What is the dreaded lockout and how is it prevented?
(b) If you experience a lockout, how is it corrected (or what should you do)?

02. Name three types of release.

''
03. At what attitude should the nose be held at for a static winch foot launch?

04. What speed should be maintained immediately after launch?

''
05. How do you judge that speed?

''
06. What speed should be flown at transition?

''
07. How do you know it is time to transition?

''
08. What bar pressure/body position should be maintained during the initial pull for a safe and secure dolly launch?

09. Whose responsibility is it to check the weak link on each flight?

10. How many strands of mason line are an appropriate weak link for:
(a) beginners
(b) experienced solos
(c) tandems
(d) paragliders

11. What approximate breaking strength would a weak link be relative to the pilot's weight?

12. What signals can be used for signaling to the winch operator that a pilot being towed wants:
(a) less tension (give two)
(b) more tension (give one)?

''
13. What is likely to be the cause if the glider starts to yaw a lot on tow?

''
14. What would then fix the problem?

''
15. Describe the different manner of effective weight shift control on tow compared to off line.

''
16. Under tow the glider starts heading off to the right. You try to correct but the glider continues in its bank, resisting your efforts. What should you do?

17. About how many tandems/solos might you expect would be required to be ready to try a step?

18. What is the minimum height above the winch to attempt a step?

19. Is there any piece of extra safety equipment required for step towing?

20. What is the minimum height at which the downwind turn should be started when stepping?

21. Why?

''
22. In what direction should the downwind turn be made?

''
23. Why?

24. Should the second step's downwind turn be made at that same height as the first?

25. Whose responsibility is the rope and bridle during towing, i.e. who pays for it if it gets lost?

26. On a thermally day where and when is it best to release to have the best chance of staying up?

27. How can you tell if you are flying straight down wind when step towing (two things)?

''
28. What is the most important focal point when turning at the downwind end for a step?

''
29. What things should be re-checked just prior to launching on a hydrostatic winch tow?
(a) Foot Launch - Give three.
(b) Dolly Launch - Give four.

30. What aspects of the Charts of Reliability, if any, should be done before winch towing?

31. If more than one which is the most important?

32. What are the aspects of a hang check for towing that differ from foot launch?

33. How do you know if you are running out of line on the downwind run?

34. If you run the line of the winch drum of the winch, what should you do?

35. What should you do if the rope breaks during a tow?

36. When you approach to land you see another glider setup to launch. What pattern should you fly?

''
37. Describe the three phases of the downwind end turn, back towards the winch on a step.

''
38. What should you do if the rope catches on your wing during a step tow?

39. Are there any considerations if the winds aloft are particularly strong when towing?

40. If the winds are strong and gusty should the weak link be stronger?

41. Snags
(a) What might you expect to happen if the winch backlashes and snags the line while running downwind?
(b) What should you do?

42. Who fills out the log book during tow flights?

43. Do tandem flights count as airtime in your log book if you are under instruction?

44. What are the important considerations when driving the ATV for rope retrieval? (3 things)

45. What signals can be used to launch without a radio?

46. What are two landing approach patterns and what determines when each is used?

47. An aircraft is heading toward the rope while you are on tow...what should you do?

48. You see the strobe light turned off while you're towing. Does that mean anything?

49. The line goes slack on tow. What's likely the meaning?

50. What words are used when launching with the radio? How do you say stop, there's trouble?

51. What speed should you be flying at while heading downwind on a step?

52. How often should a reserve parachute be repacked?

53. Describe the method you would use to deploy your reserve parachute for the harness that you use or will be using?

54. Downwind turn
(a) During your downwind turn, would it be bad to turn completely back downwind?
(b) Why or why not?

55. If you were coming up over the winch and getting ready to turn to do a step, what would it mean if your shadow was very close to the winch?

56. Are there any physical barriers at your towing site that you are not allowed to do your steps over?

57. In each of the following situations (including diagram on next page), what direction do you think it would be best to do your first upwind turn and what direction for subsequent turns?

59. How many hours does it take from the consumption of alcohol before you're legally allowed to fly?

60. What type of airspace is between ground level and 7000 feet above ground level at your tow site?

Be careful, fly safe, have fun.
Gold mine. Mike Robertson's "Towing Aloft". Endorsed by...

http://hpac.ca/tow/
http://hpac.ca/tow/resources/

...HPAC. I WILL be having fun with this one.
User avatar
Tad Eareckson
Posts: 9161
Joined: 2010/11/25 03:48:55 UTC

Re: instructors and other qualified pilot fiends

Post by Tad Eareckson »

http://www.docstoc.com/docs/112851827/More-Tension-Brian-Fotheringham-Michael-Robertson-Leslie-Peter-Darian
MORE TENSION - Brian Fotheringham / Michael Robertson
MORE TENSION

Written by Brian Fotheringham
Edited by Michael Robertson & Leslie
Updated by Peter Darian
2004/04/22 18:49:04
This has also been edited by Tad Eareckson to clean it up and improve the readability a bit. But I've left a few of the errors because they're very good indications of the reliability of the information and authors and editors.

For example...
- Roberston - sickenly - Dickensen - Hewitt - Dewolf - Paraliding - ten;sion - accellerate - decellerate - seconnd - parchute

If the authors and editors can't be bothered to get names (including one's own) right and run things through spellchecks the reader has a real good idea that they haven't done their homework on the shit that keeps people alive and gets them killed. And while this writing itself is a lot better than most of the semiliterate crap that comes out of hang gliding that is most assuredly the case here.
Having gone through just over a year of towing after my intro. course on the bunny hill, I've experienced the ups and downs of learning towing.
Sorry dude. You haven't learned towing - just how Mike Robertson and a lot of the industry do towing.
(I also spent many a weekend sitting in a field waiting for the winds to drop to beginner level so I could have the chance to learn towing.)
Those days were a lot more productive and rewarding than the one Zack Marzec had at Quest on 2013/02/02.
During that time, I began doing much of the writing for, and editing of the newsletter for our tow club. It only seemed a natural extension to take on the task of creating a tow manual seeing as writing is now in my blood and learning to tow is still fresh in my mind (especially the "what not to do" parts of it). So here we are...
And here we are now in the summer of 2013 and there's been plenty of shit that's happened in the ensuing nine plus years that should've caused you to rethink what you wrote and either fix it, have it pulled down, or very publicly disavow it.
Although the bulk of the information comes from my year of experience, Michael Roberston and Leslie (last name withheld due to camera shyness), a couple of old pros at this towing thing...
Fuck old pros - every last one of them. This is a seriously broke system, has been over the course of its entire existence, and anybody in this game who gives a shit about anything should be screaming bloody murder nonstop. And NONE of them are making the slightest peeps.
...have done a job on editing this writing...
What kind of a job?
...to ensure that anything of importance which I haven't thought of or experienced still gets its place in these pages.
Sorry. Anybody who signed off on this one is a dangerous shithead.
The end result is a manual written with the combined forces of young and old experience alike.
But without anything remotely resembling competence.
This first edition of the manual will be expanded on in both writing and illustrations as feedback from the pilots who use it is gathered.
Looks like nobody found anything that could be improved upon. (Stay tuned.)
The illustration part will improve dramatically once I either learn how to draw or hire an artist to do it for me...
Talked to Dennis Excellent-Book Pagen?
As with all things in this sport, everyone's input is important, and pilot input regarding this manual can only help to make future editions a superior product.
But make sure you stay the hell away from...

http://ozreport.com/forum/viewtopic.php?t=24846
Is this a joke ?
Jim Rooney - 2011/08/25 04:55:25 UTC

It always amazes to hear know it all pilots arguing with the professional pilots.
I mean seriously, this is our job.
We do more tows in a day than they do in a month (year for most).

We *might* have an idea of how this stuff works.
They *might* do well to listen.
Not that they will, mind you... cuz they *know*.

I mean seriously... ridgerodent's going to inform me as to what Kroop has to say on this? Seriously? Steve's a good friend of mine. I've worked at Quest with him. We've had this discussion ... IN PERSON. And many other ones that get misunderstood by the general public. It's laughable.

Don't even get me started on Tad. That obnoxious blow hard has gotten himself banned from every flying site that he used to visit... he doesn't fly anymore... because he has no where to fly. His theories were annoying at best and downright dangerous most of the time. Good riddance.
...Tad. His theories were annoying at best and downright dangerous most of the time. Just go with whatever Jim Keen-Intellect Rooney is saying at any given moment because he's a PROFESSIONAL PILOT and *might* have an idea of how this stuff works.
Except, of course, when one of his fellow professional pilot buddies gets splattered all over the runway...

http://4.bp.blogspot.com/-bRrpHNa68iY/UQ6Pv9gRZyI/AAAAAAAAjTg/Hc22bx5122Q/s2048/20943781_BG1.jpg
Image

Then neither he no any of his of his asshole fellow professional pilot buddies...

http://ozreport.com/forum/viewtopic.php?t=30971
Zach Marzec
Jim Rooney - 2013/03/07 18:24:58 UTC

You're the one advocating change here, not me.
I'm fine.

These are only questions if you're advocating change. Which I'm not. You are.

You're the one speculating on Zack's death... not me.
Hell, you've even already come to your conclusions... you've made up your mind and you "know" what happened and what to do about.
It's disgusting and you need to stop.
You weren't there. You don't know.
All you have is the tug pilot report, who himself says he doesn't know... and HE WAS THERE... and he doesn't know.

Ever heard of "Confirmation Bias"?
Because you're a textbook example.
You were out looking for data to support your preconceived conclusion, rather than looking at the data and seeing what it tells you... which is why this is the first time we've heard from you and your gang.

Go back to Tad's hole in the ground.
While you're there, ask him why he was banned from every east coast flying site.
...has the slightest fuckin' clue how this stuff works - just raging hatreds for weekend warrior pilots who have other ideas on how this stuff works.
A little warning before you read on...

As you already know, by the time you're learning to tow, hang gliding is generally a very safe sport...
Of course it is. That's what all instructors are most concerned about their beginning students understanding.
...but can, in some cases, be very, very dangerous!
But not, of course, in towing. As long as you have a really light weak link in the system it's physically impossible for anything bad to happen. So chill on the fear mongering, dude.
As with any kind of instruction, this manual serves only as a guide to learning safe towing practices. Unfortunately, there is no way to predict all possible events or situations, so there is no way teach all of them in any one manual.
Bull fucking shit. You name me one single tow disaster from the history of hang gliding that wasn't easily and totally predictable.
Use this writing only as a part of your towing instruction, and be sure to seek professional help before attempting to tow.
And as long as you've got professional help...

0:50
http://www.youtube.com/watch?v=JR_4jKLqrus

http://www.youtube.com/watch?v=VYe3YmdIQTM


...there's no fuckin' way you'll be at the kind of risk to which these guys:

http://www.youtube.com/watch?v=b3OMoQDbL3o

http://www.youtube.com/watch?v=GjpCpgTiDS4


are subjecting themselves.
Instructors, other pilots...
Instructors and other qualified pilot fiends...
...and your own experiences and knowledge will be required to help you succeed and keep you safe.
What you're doing is NOT SAFE - *PERIOD*.
Anyway, if you can learn the lessons contained in the pages that follow, take the time to practice, soak up knowledge from your instructors and fellow pilots and always fly safely...
You hafta know what that IS first. And neither you, your instructors, nor your fellow pilot fiends have fuckin' clues.
...you'll soon be stepping your way to cloudbase and enjoying a freedom few people ever discover. Up is good!
Yeah?
The weak link, which is light mason twine or leech line, looks like thin, useless string in comparison to the Spectra line and the rope of the bridle, but it serves a special purpose and is extremely important when towing.
Pick one, dude.
---
2013/08/08 15:54:00 UTC

Sorry 'bout this post which was entered as "delayed" for a couple hours this morning. I had trouble with the previous entry and wound up with a double-post. (Yeah, I could've just deleted it but I'm really anal about records (and, of course, everything else) and missing post numbers really bug me.)
User avatar
Tad Eareckson
Posts: 9161
Joined: 2010/11/25 03:48:55 UTC

Re: instructors and other qualified pilot fiends

Post by Tad Eareckson »

http://www.docstoc.com/docs/112851827/More-Tension-Brian-Fotheringham-Michael-Robertson-Leslie-Peter-Darian
MORE TENSION - Brian Fotheringham / Michael Robertson
Whether you've just finished your beginner course on the training hill or spent the last five years running off of giant mountains as spectators gasp in awe...
...you're almost certainly fucked - because, for all practical purposes, there's no such thing a solid hang gliding instruction.
...you're eventually going to run into some evil flatlands or mountain sites with wholly uncooperative winds. In either case it becomes sickenly hard to get into the air and that, as you well know, isn't for the birds. Fortunately there is another solution: the wonderful art of towing.
Unfortunately, it's NOT an ART...

http://groups.yahoo.com/group/hhpa/message/11598
on "Tad"
Zack C - 2010/11/10 06:18:31 UTC

One more thing I'll add...I don't think of this sport as 'an art and a science'. Music and paintings are art. Aviation is pure science. I'm not saying feel and intuition aren't important - in fact I believe they are, but ONLY because they compensate for a lack of understanding of the science.

Flying is unintuitive and a reliance on intuition is dangerous. This is one of the main points of Langewiesche's "Stick and Rudder".
Well, the way Mike Robertson practices it is - but it's not supposed to be. And the consequences of treating a science as an art can and do get pretty ugly.
To the foot launch fanatic, towing is virtually a portable mountain. Whether it's stationary winch, aero towing, payout winch or any other style, towing will get you into the air whenever you can't run into it!
What? There's no such thing as foot launch towing?
For the new student, it provides a super fast way to gain air time and skills. For the seasoned pilot it provides a variety of new experiences and ways to get to cloud base.
Except, of course...

http://ozreport.com/forum/viewtopic.php?t=24846
Is this a joke ?
Jim Rooney - 2011/08/28 19:39:17 UTC

Weak links break for all kinds of reasons.
Some obvious, some not.

The general consensus is the age old adage... "err on the side of caution".

The frustration of a weaklink break is just that, frustration.
And it can be very frustrating for sure. Especially on a good day, which they tend to be. It seems to be a Murphy favourite. You'll be in a long tug line on a stellar day just itching to fly. The stars are all lining up when *bam*, out of nowhere your trip to happy XC land goes up in a flash. Now you've got to hike it all the way back to the back of the line and wait as the "perfect" window drifts on by.

I get it.
It can be a pisser.

But the "other side"... the not cautions one... is not one of frustration, it's one of very real danger.
Better to be frustrated than in a hospital, or worse.
No exaggeration... this is the fire that the "other side" is made of. Best not to play with it.
...on the really good days.
For the competition sky dog and world record hound it offers new and varied venues.
Just as long as you fly with the dangerous crap...

http://ozreport.com/2013USNationalsrules.php
2013 US Nationals at Big Spring, Texas
2.0 EQUIPMENT

Appropriate aerotow bridles

Competitors must use appropriate aerotow bridles as determined by the Meet Director and Safety Director and their designated officials.

Weaklinks

Pilots must use weaklinks provided by the meet organizers and in a manner approved by the meet organizers. All weaklinks will be checked and use of inappropriate weaklinks will require the pilot to go to the end of the launch line to change the weaklink.
...that Davis orders you to.
For tandem pilots and instructors it offers quick turnaround and flexibility.
http://4.bp.blogspot.com/-bRrpHNa68iY/UQ6Pv9gRZyI/AAAAAAAAjTg/Hc22bx5122Q/s2048/20943781_BG1.jpg
Image
For all pilots, it provides a far greater freedom to do what we want to do most - FLY!
YEEEEE...

Image

...HAW!!!
Towing has been evolving since a time before hill flying had begun and has developed in a number of different directions.
Mostly backwards.
In fact there are so many different ways to tow now...
As long as you don't have a lot of silly hang-ups about safety and competency.
...that you can, to some extent, rediscover flying over and over again without ever being grounded.
http://farm9.staticflickr.com/8143/7462005802_bbc0ac66ac_o.jpg
Image
This manual will provide a brief history and discussion on the various kinds of towing available and how they came to be.
Maybe you could write a manual on how to get some of them permanently outlawed.
At the end of the manual there is a set of test questions which you should be able to answer with a little reading and a little thinking.
Yeah, you certainly wouldn't wanna engage in Robertson towing after A LOT of reading and thinking.
Once you understand what's covered in these pages, you'll be almost ready to step yourself to cloud base!
But first I'd strongly advise that you understand what *I'M* gonna cover to reveal that what's in those pages is largely a load of crap.
THE HISTORY OF TOWING

Contrary to popular belief...
Sorry, popular belief is the foundation of everything we do in hang gliding. If you're gonna start going contrary to it I'm gonna stop listening.
towing actually pre-dates foot launch in the hang gliding world. In its rawest form, it appeared in Australia through Moyes...
Fuck Bill Moyes.
...and Dickensen...
Dickenson.
...in 1962 and showed up here in the form of boat towing in 1968. In these early days the glider was pulled with the rope connected directly to the base bar which, as you'll learn later, resulted in huge lockout potential. Eventually the rope attachment was modified to connect to a bridle with releases at the top and bottom of the A-frame. This helped but certainly wasn't the future.
But then Donnell Hewett came along and showed us how to route tow tension through the pilot rather than the control frame and the system became...

http://www.youtube.com/watch?v=k9fQuDzFuCE

10-1900
http://farm8.staticflickr.com/7528/15787746292_f64cccaf31_o.png
Image

...autocorrecting.
1976: The Hewitt Skyting Bridle was created.
- Bullshit...
Donnell Hewett - 1983/12

It's hard to say when skyting was born. It was conceived during the summer of 1980, developed during the fall, written up for publication in December 1980, first published in Hang Gliding in April 1981, rejected by the established hang gliding community almost immediately, self-published in SKYTING NO. 1 in October 1981, reintroduced to the hang gliding community in Whole Air in March/April 1982, and promoted through the Skyting Newsletter since June 1982.
Off by four years.

- HewEtt.

- The Skyting Bridle was concocted. Nobody with the least of common sense continued using it after one point and one to one bridles arrived on the scene. The Brooks Bridle which was developed shortly after and independently from the Skyting Bridle is much more the ancestor of modern bridles.
This new bridle hooked to the keel six inches in front of the centre of gravity (CG) and to the pilot.
Donnell was hooking his to his Gemini cross spars junction because he thought he was shooting at the center of mass of the glider more accurately and would be able to prevent lockouts better.
It instituted a light form of weak link.
And the single most totally moronic, deadly, and widespread reinvention of a wheel...

http://www.youtube.com/watch?v=WFAPpz6I6WU

http://www.youtube.com/watch?v=VYe3YmdIQTM


...in aviation history.
1978: The use of three ring releases (from parachuting) began.
I doubt it. The first record I can find is 1983.
1981: Centre of mass aero towing begins using Trikes from France.
I'm gonna say 1983 and one point initially.
1984: Forburger's...
Grade A asshole.
...ATOL platform launch system was produced.
I'd say early 1986 - maybe late 1985.
It incorporated a payout winch with centre of mass towing.
No it didn't. It was always one point. Anything else would be totally idiotic.
The glider would be mounted on the vehicle. This made tandem flying much easier.
- Fuck tandem flying.
- It doesn't make it much easier than the launch dolly the Danes were using in 1983 that nobody ever talks about.
1986: Three-string releases were implemented to avoid taking metal into the air unnecessarily.
Big fuckin' deal. Metal is only an issue for people - like Donnell - clueless enough to use elastic bridle and towline materials. Just ask Mike Dead-Eye Robertson.
1987: Greg Dewolf's Fly America Team flew from L.A. to North Carolina using successive tow launches.
- DeWolf.
- Thanks for all your contributions to unhooked launch and weak link discussions, Greg.
1990: Stationary winch and step towing made it here to North America from Europe.
Where the Germans had been using it since at least 1986. Great job, North America.
1992: Aero towing reaches new heights and levels of safety with the aid of new ultralight tugs, designed specifically for towing hang gliders.
- Fuck Bobby, Bill, and the Dragonfly.
- They did their promo tour with it in 1991 - and it may have been airborne as early as 1989.
With the continuing advances in towing...
Name:
- some advances we've seen in North America in the past couple of decades
- a single goddam thing Mike's ever contributed to towing theory, procedures, or technology
...it is likely to become the future of our sport in many ways.
Institutional stupidity, commercialization, centralization of power, corruption.
Most of the world records for distance recorded in both hang gliding and paragliding over the recent past began with, or were initiated with tow launches.
The six consecutive Davis Links in light morning conditions at Zapata in 2011 come to mind.
User avatar
Tad Eareckson
Posts: 9161
Joined: 2010/11/25 03:48:55 UTC

Re: instructors and other qualified pilot fiends

Post by Tad Eareckson »

http://www.docstoc.com/docs/112851827/More-Tension-Brian-Fotheringham-Michael-Robertson-Leslie-Peter-Darian
MORE TENSION - Brian Fotheringham / Michael Robertson
EQUIPMENT

OK, let's get to the point. Enough about the past and the general state of affairs in the world.
Especially with all the glaring errors.
It's time to focus on how you're going to get in the air, because really, that's what this is all about.
Before you start thinking about getting into the air you need a solid foundation in THEORY - and Mike don't got it and, consequently, neither do you.
The first thing you need to become familiar with is the additional pieces of equipment used to get you in the air when towing. There aren't that many, but you need to know at least a little about each one before you can tow successfully.
Big difference between towing successfully and towing competently and safely.
The Winch

For stationary winch towing, the winch is basically just that - stationary. It may be on a trailer, it may be on the back of a pick-up truck, it may be attached to a NASA implemented retaining device, bolted to a cement block in the ground, or just about anywhere else you can imagine. The point is, once ready for towing (and during towing), the winch stays exactly where it is and pulls a glider into the air using a rather long length of line. Specifics about the winch aren't really important to the pilot as long as it is reliably designed and operated.
Which, based on my experience with Mike, it won't be.
The Line

The line we use for towing is called Spectra. It is thin, light, hollow-braided line that is designed to withstand 1500-1800 pounds of tension (more than enough to pull a glider and pilot into the air).
Did Mike say anything about the elasticity...
Rodney Nicholson - 1986/11
Ontario Hang Gliding Association

In the third and most recent incident, the weak link broke shortly after launch and the end of the tow rope, with metal ring attached, whiplashed back and hit the spotter/winch operator in the eye. At present the chances appear 90 percent that he will lose the eye completely.
...of Spectra?
The Bridle...
You don't use a bridle with a two stage release. There's only one point at the glider that sees tension.
We use a two stage release which requires two different ends on one length of rope and, as we have only one line coming from the winch, the bridle provides the split...
There's a better way to do this:

http://www.youtube.com/watch?v=il3YPp3Rfq8
The Weak Link

The weak link, which is light mason twine or leech line, looks like thin, useless string in comparison to the Spectra line and the rope of the bridle, but it serves a special purpose and is extremely important when towing.
Yeah. *A* special purpose. But neither Bill Moyes, Donnell Hewett, Jerry Forburger, Greg DeWolf, Mike Robertson, nor you has a fuckin' clue what that special purpose IS or how to select a strength to suit that purpose.
As the name implies, it is the weakest part of the connection between the glider and the winch. It's there to be broken, if it needs to be.
- How are you defining needs to be? You could be locked out with destruction of the glider and yourself inevitable without a separation from tow in the next second or two. You could say the weak link NEEDS TO BE broken at that point - but if you're expecting it to you're virtually guaranteed to have your glider and yourself destroyed within the next few seconds.

- Is it possible to wind up with a totaled glider and dead as a consequence of the weak link breaking when it DOESN'T NEED TO?
It is a safety link...
Bullshit.
- It has almost nothing to do with safety.
- In the event that it breaks when "it needs to" you should not expect to survive what's highly likely to happen next.
- A weak link will never break at a halfway competently run operation.
...and it breaks quite consistently...
How:
- "consistently"? Have you or Mike done the testing to give as a plus or minus percent?
- "consistently" does it need to be to do its job?
- "consistent" is the response of the glider after it does its job?
...at a calibrated amount of tension to prevent over-stressing the system.
- What part of "the system" NEEDS protection from over-stressing?
- Have you ever been in a situation in which the "the system" needed protection from over-stressing?
- Are you aware of any incidents in which the "the system":
-- needed protection from over-stressing?
-- was overstressed because the weak link wasn't "calibrated" to break quite consistently?
The weak link will also be discussed in great detail in a future section.
- Goddam right it will be.

- It's also gonna be discussed in great detail after the 2013/02/02 Zack Marzec fatality - but not by Bill Moyes, Donnell Hewett, Jerry Forburger, Greg DeWolf, Mike Robertson, or you.
Post Reply