Higher EDUCATION - 2011/09
MORE ABOUT AEROTOWING AND THE CONE OF SAFETY
by Drs. Lisa Colletti & Tracy Tillman
This is a follow-up to our June 2011 article on use of curriculum and our July 2011 article on how to get the aerotow (AT) rating, with a focus on learning more about out-of-position maneuvers and the cone of safety.
TRACY: You and I have received many forms of flight training and professional career training over the years. Is there anything you recall as being significant about those learning experiences?
LISA: Yes, two things. First: Getting thorough training pays off in the long run--not quick, cheap and superficial training. Second: Having an instructor or school that is well-organized and presents and follows a clear syllabus or curriculum makes the training more understandable, effective, and efficient [ref 1].
TRACY: It is human nature to look for deals and take advantage of opportunities to spend less time and money for flight training. We've tried that, and, in every case in our shared experience we feel we have received sub-standard training with cheap package deals and have ended up spending more time and money in the long run to become competent at that particular skill. Alternatively, you selected one of the best and most rigorous medical training programs for surgery in the country, Lisa, as I did for engineering, and there is no question that it paid off for us. We learned to take the same approach in flight training and looked for high quality. It is more fun and easier to learn skills from a thorough, well-designed training program than from a superficial one.
LISA: Yes. Do you think people really want to be treated by a surgeon or doctor who is not well trained or want to fly with an airline pilot who is not well trained?
TRACY: Of course not. But why do some people want to skimp on their flight training? Basically, it means that when you are flying solo, you are flying alone with someone (yourself) who is not well trained. Who would want to do that?
LISA: Some pilots, very unwisely, are willing to take that risk. However, a wise tug pilot or aerotow operator is not going to want to put himself or his operation at risk by towing an under-trained pilot and will require such a pilot to get more training at their site before they will tow any pilot with questionable skills.
TRACY: A recent article about the nature of pilots in the July 2011 issue of AOPA Pilot magazine [ref 2] stated: "Eighty percent of pilots believe themselves to be in the top twenty percent" and the reality is that half of us are below average."
LISA: Unfortunately, those students--whether above or below average--who tend to over-estimate their own skills and abilities think that a school or instructor is being thorough just to get more money from the student.
TRACY: Also, some people are naturally frugal, which exacerbates the problem of their paying for instruction.
LISA: Well, flight training is not the place to be overly frugal or superficial. It's important that the instructor takes some of the mystery out of the training program by presenting and explaining a well-constructed syllabus or curriculum to the student, so the student understands what needs to be learned and why.
TRACY: Advertisements for schools and instructors (or any product or service) cannot always be trusted; advertising is often more about selling the sizzle than the steak. Word of mouth is better, but it's not always reliable because of the rule of primacy [3]. Deals are great if you get high quality for less money, but you need to make sure you are getting high value and high quality. When looking for a good school or instructor, look at their curriculum. A thorough curriculum delivered by a good instructor is the steak--look for that, rather than the sizzle.
LISA: That brings us to why we are discussing the cone of safety this month--to provide a better, more thorough understanding of aerotow (AT) curriculum and how an AT curriculum should teach AT students to meet USHPA's AT rating requirements.
TRACY: First, let's look at the nature of aerotowing. Anyone who flies and/or tows both sailplanes and hang gliders knows that aerotowing is fundamentally the same for either one. Both systems (a) normally use the same length towrope, which is about 200 feet; (b) have releases and weak links at both the tug end and glider end of the towrope; and (c) use similar towing techniques for straight flight, turning flight, lockout prevention, and release.
LISA: Of course, there are some differences in overall weight and tow speed. But what's most important is that sailplanes are much more controllable on tow than hang gliders, because sailplanes have aerodynamic controls and tail surfaces at the end of a long fuselage. Flying-wing sailplanes are more sensitive in pitch control, but still offer more overall control on tow than hang gliders.
TRACY: Yet, until the recent past, the standards in the US for learning aerotow skills for sailplanes (which are easier to tow) have been much higher than for learning aerotow skills for hang gliders (which are more difficult to tow). The biggest recent improvement in USHPA's aerotow rating requirements has been the addition of tandem flight demonstration of out-of-position control on tow--specifically, flying the cross and diamond maneuvers within the cone of safety [refs 4,5].
LISA: The cross and diamond out-of-position maneuvers for hang gliders are akin to the box-the-wake maneuver [ref 6] used for sailplanes, but modified for hang gliders due to their lack of aerodynamic control.
TRACY: How long has the box-the-wake maneuver been used for sailplane aerotow training?
LISA: The earliest reference in print that we could find about it [ref 7] was before the birth of modern hang gliding, in the early 1960's. We spoke with some older sailplane pilots who said it was used long before that.
TRACY: People have been aerotowing gliders for over 80 years. Glider flying was most prevalent in Germany prior to WW II, primarily due to limitations on powered flight that was imposed upon them by the Versailles Treaty. Anton Fokker (designer of the WWI Fokker Triplane) proposed the idea of aerotowing during WWI [ref 8]. Gottlob Espenlaub (a 1921 hang glider pilot!) and Gerhard Feiseler (designer of the Feiseler Storch) performed numerous aerotow demonstrations in 1927 [ref 9]. Gunther Groenhoff flew a Fafnir glider (designed by Alexander Lippisch--who also designed the Me-l63 Komet flying wing fighter) 272 miles after an aerotow launch in 1931 [ref 10].
Most of Germany's military pilots at the start of WW II had previous glider flying experience as youngsters, prior to the war. A lot of them were pretty good at dead-stick landing their planes after getting shot down, rather than bailing out. Erich Hartmann (352 victories) force-landed 14 times, Heinz Bar (221 victories) was shot down 18 times, and Erich Rudorffer (224 victories) was shot down 16 times [ref 11]. All three survived the war.
LISA: The Germans were the first to use gliders to deploy soldiers for invasion. The Russians also used gliders during WWII, but they used them more for smaller-scale delivery of supplies and equipment to front lines or partisans than for large-scale deployment of soldiers for invasion [ref 12].
TRACY: And the British and US Army used gliders on quite a large scale in Europe for deployment of both personnel and equipment. According to Don Abbe, curator of the Silent Wings Museum, it was during this time that the US army developed very specific, standardized techniques for out-of-position tow training [ref 13]. The museum has original WWII glider pilot training manuals in its collection.
LISA: So standardized out-of-position tow training has been around for nearly seventy years, as a practical tool for training students to aerotow. It is amazing that it has only been required by USHPA for the last couple of years.
TRACY: Well, we and some other hang gliding aerotow schools have been teaching the cross and/or diamond or other out-of-position maneuvers for some years, but many others have not been teaching these skills, since it was not required by USHPA until recently.
LISA: If out-of-position maneuvers are such an important part of aerotow training, why do you think it was not required by USHPA long ago?
TRACY: Many hang glider pilots and instructors are or were not also sailplane pilots and did not know about out-of-position and other standard aerotowing training techniques. Because of that, much of the development of hang glider aerotowing has been a slow re-invention of the wheel. Also, as we previously mentioned, there is always pressure on instructors to lower standards, because of the frugality of some students and the nature of too many pilots to overestimate their own skills and abilities.
LISA: OK. So let's talk about the cone of safety.
TRACY: The cone of safety is a border around the normal, center tow position, which delineates the out-of-position point at which a lockout or loss of control will occur. By definition, loss of controllability on tow is considered a lockout. A lockout can occur from being too far from center, left or right, up or down, or diagonally.
In Figure 1, you can see that the center of the cone of safety, the "Sweet Spot," is directly behind the center of the plane, with the cone of safety (the yellow line) centered on the wheels of the tug, and both the wheels of the tug and the center of the cone of safety on the horizon.
LISA: Keeping the wheels of the tug (and the center of the cone of safety) on the horizon is a typical normal, center position for towing behind most Dragonflys. Normal tow position is dependent upon the tug design and climb rate of the tug. It is typical when towing behind trikes and lower-powered tugs to tow a bit higher, with the wing on the horizon.
TRACY: Here at Cloud 9, our tugs have nearly twice the horsepower and climb rate of other tugs. The most dangerous phase of aerotowing occurs when both the tug and glider are near the ground, so it is desirable to minimize the time we are near the ground. In our case, because of our high climb rate and climb angle, our normal tow position at Cloud 9 is for the hang glider to be a bit lower than shown in Figure 1, so the wheels of our tugs are somewhat above the horizon. If pilots are too high above the sweet spot on tow, they are closer to the upper border of the cone of safety, and pilots experience a significant reduction in climb rate on tow, nearly 200 feet per minute. For greater safety, moderate control bar and joystick pressure, reasonable towing airspeed, and better climb performance, pilots should tow in the sweet spot in the center of the cone of safety that is specific to the tug they are flying behind.
LISA: When teaching students to tow, we first have them work on learning up-and-down position control. We handle side-to-side control and have them focus on up-and-down position control. This is helpful, because it is less work load, less demanding, and less confusing for the student, so they can focus on learning that one specific skill.
TRACY: It is especially important to start with up-and-down position control, because some students, even experienced hang glider pilots, may exhibit a tendency to reverse control when initially learning to keep themselves in correct position on aerotow. It is very important for both instructors and their students to know that even though some experienced pilots may not reverse control in free-flight, they may reverse control when initially learning to follow the tug on aerotow.
LISA: Basically, we have them take control of vertical control, while we handle horizontal control, and have them just try to stay at the level of the sweet spot. Then, we have them slowly move a bit higher, relative to the tug, hold momentarily, then go back to the level of the sweet spot. We repeat that maneuver several times, going a bit higher each time, until they get to the highest point on the border of the cone of safety. Then we repeat the process, except we have the student go down and back up from the sweet spot to a low tow position and back to the sweet spot.
TRACY: Once the student can reasonably control the glider's vertical position, we take over up-and-down control and have them work in the same fashion to learn side-to-side position control, eventually reaching the far left and right positions on the border of the cone of safety.
LISA: Once the student pilots can reasonably handle vertical vs. horizontal position control (pitch and roll/yaw control) as separate actions on their own, we have them take over both vertical and horizontal position control simultaneously on their own. After they can reasonably keep the glider in the sweet spot completely on their own while controlling both axes of movement simultaneously, we begin to have them practice the entire cross maneuver.
TRACY: The cross maneuver begins at the sweet spot (see Figure 1). The first movement is to slowly climb to the high (12 o'clock) tow position on the border of the cone of safety and hold there for a second-or-so, before slowly moving back down to the sweet spot. The student must demonstrate simultaneous vertical and horizontal control by keeping the glider on the vertical centerline of the tug as they move up and down.
LISA: As you can see in Figure 2, the high (12 o'clock) position is shown with the glider and horizon at the top border of the cone of safety and the tug and center of the cone of safety below the horizon. This high point position must be pre-determined and practiced ahead of time by the tug pilot and instructor to know exactly where it should be for the particular tug that is being used for training.
If the glider gets too high, the tug may lose pitch authority and speed up to the point where the glider is going so fast the glider pilot cannot get lower or even hold the glider's position, thus locking out vertically. This is particularly dangerous for the tug pilot when near the ground, as the tug pilot can lose pitch authority and be driven into the ground. It is also more likely to happen when hang glider pilots use a pro-tow (shoulder-only) tow bridle. Students must be trained to release from tow if they get too high, outside of the vertical limit of the cone of safety.
Here at Cloud 9, the high tow position is actually with the wing of the tug on the horizon, because our normal sweet spot position is reached when the wheels of the tug are above the horizon.
TRACY: After slowly moving back down to the sweet spot, the student pilot slowly descends to the low (6 o'clock) tow position on the low border of the cone of safety and holds there for a second-or-so, before slowly moving back up to the sweet spot. Again, the students must demonstrate simultaneous vertical and horizontal control by keeping the glider on the vertical centerline of the tug as they move down and back up to the sweet spot.
LISA: As you can see in Figure 3, the low (6 o'clock) position is shown with the glider and horizon at the bottom border of the cone of safety and the tug and center of the cone of safety above the horizon. Like the high position, the low point position must be pre-determined and practiced ahead of time by the tug pilot and instructor to know where exactly it should be for the particular tug that is being used for training. The low tow position must be somewhere above the prop wash, prior to where either the hang glider or tug loses controllability. This is particularly dangerous for the hang glider pilot when near the ground, as the hang glider pilot can lose airspeed and controllability if he hits the prop wash near the ground and can be driven into the ground.
Here at Cloud 9, our low tow position is lower than what is shown in Figure 3, because our normal sweet spot position is located with the wheels of the tug above the horizon.
TRACY: After slowly moving back up to the sweet spot, the student pilot slowly slides left to the left extreme (9 o'clock) tow position on the left border of the cone of safety and holds there for a second-or-so before slowly moving back to the right, to the sweet spot. Again, the students must demonstrate simultaneous vertical and horizontal control by keeping the glider on the horizontal centerline of the tug as they move out to the left and back to the sweet spot.
LISA: As you can see in Figure 4, the left extreme (9 o clock) position is shown with the glider, tug wheels, and horizon at the horizontal center line of the cone of safety. Like the high and low extreme positions, the left extreme position must be pre-determined and practiced ahead of time by the tug pilot and instructor to know where exactly it should be for the particular tug that is being used for training.
The left extreme position must be somewhere before the student pilot will lose control of the glider and lockout to the left. Going to this position on the left border of the cone of safety gives students recognition of when a lockout may start and the ability to smoothly move the glider left and right with very little banking of the wing.
Students must be trained to release from tow if they get farther outside to the left, outside of the cone of safety. A glider can get quite far off to the side, as long as the wing is kept relatively level. Typically, when using a three-point tow bridle, the glider can get about 20 degrees off to the side of centerline without locking out [ref 14].
Here at Cloud 9, our extreme left tow position occurs when the hang glider pilot can line up the tail wheel of the tug with the right main wheel of the tug.
TRACY: After slowly sliding back to the right to the sweet spot and holding momentarily, the student pilot continues to slowly slide over to the right extreme (3 o'clock) tow position on the right border of the cone of safety and hold there for a second-or-so before slowly moving back to the left and back to the sweet spot.
Again, the student must demonstrate simultaneous vertical and horizontal control by keeping the glider on the horizontal centerline of the tug as they move out to the right and then back to the sweet spot.
LISA: As you can see in Figure 5, the extreme right (3 o'clock) position is shown with the glider, tug wheels, and horizon at the horizontal centerline of the cone of safety. Like the high and low and left extreme positions, the right extreme position must be pre-determined and practiced ahead of time by the tug pilot and instructor to know where exactly it should be for the particular tug that is being used for training. The right extreme position must be somewhere before the student pilot loses control of the glider and lockout to the right. Going to this position on the right border of the cone of safety gives students recognition of when a lockout may start on this side of the tug and the ability to smoothly move the glider right and left with very little banking of the wing. Students must be trained to release from tow if they get farther outside to the right, outside of the cone of safety.
Here at Cloud 9, our right extreme tow position is when the hang glider pilot can line up the tail wheel of the tug with the left main wheel of the tug.
TRACY: After students have mastered the cross maneuver and other basic tow skills, they are taught to perform the diamond maneuver. It is more difficult than the cross maneuver because the students must simultaneously move and control their position in two axes rather than one. The sweet spot, high and low, and left and right positions are the same as for the cross maneuver, on the border of the cone of safety.
LISA: The procedure consists of slowly rising from the sweet spot to the 12 o'clock position (see Figure 2) and holding for a second-or-two, then simultaneously moving down and to the right to the 3 o'clock position (see Figure 5) and holding for second or two, then simultaneously moving down and to the left to the 6 o'clock position (see Figure 3) and holding for a second or two, then moving up and to the left to the 9 o'clock position (see Figure 4) and holding for a second or two, then moving up and to the right, back up to the twelve o'clock position, see Figure 2) and holding for a second or two, before moving straight hack down to the sweet spot.
TRACY: This realistically gives the student pilot a feeling of how the glider feels at all positions around the cone of safety and how to precisely control and move the glider in two axes simultaneously, in order to get back to the sweet spot if they get knocked out of the normal sweet spot position by turbulence on tow.
LISA: Do you have any other general comments about doing these out-of-position maneuvers?
TRACY: Oh ya, you betcha, don'tcha know--gel?
LISA: You may be a cone-head, but it's obvious you're not from France. What foreign language is that?
TRACY: Well gosh-golly-darn-it, you know I'm from Minnesota....
LISA: You bet [ref 15].
TRACY: First, these out-of-position maneuvers must be performed in smooth air and with a tandem pilot/instructor and tug pilot who has experience flying these maneuvers. Second, the movement from point to point should be in a straight line, with a consistent slow speed that takes about five seconds to get from point to point and with a momentary hold at each point. Third, you may notice that the shape of the cone of safety is an oval; as long as the wings of the hang glider are kept relatively level, and a three-point bridle (not pro-tow) bridle is used, the hang glider can safely get farther off to the left or right side of the sweet spot, before locking out, than it can go high or low before locking out.
LISA: I'd like to add that the cone of safety is smaller when launching and near the ground. There is less room for error.
When launching, the pilot must rise from the cart to get above the prop wash, but not too high, so as to avoid pulling up the tail of the tug. Basically, when launching and climbing out, the hang glider should be at the same level as the tug, so both the tug and the hang glider are in the same wind gradient. When launching in wind, the wind speed near the ground is lower due to gradient, and the wind speed is higher farther above the ground due to gradient. Therefore, if the glider gets low on launch, the glider not only pulls the tail of the tug down, but the airspeed of the tug at its higher altitude may be significantly higher than the airspeed of the glider that is close to the ground. This can cause the tug to zoom up even higher and the glider to get stuck with low airspeed and stay in the prop wash of the tug.
TRACY: Conversely, if the hang glider gets too high on launch, it will zoom up into higher wind speed above the level of the tug and pull the tail of the tug up. This can quickly degenerate into a vertical lockout (especially with a pro-tow bridle), and drive the tug into the ground.
It is critical for the hang glider pilot to be at the same altitude as the tug (usually wing on the horizon) throughout the climb through the wind gradient, perhaps to 200 feet agl. After getting through the wind gradient and mechanical turbulence that is closer to the ground, the hang glider pilot can move into the normal sweet spot tow position.
Another very dangerous condition occurs when instruments or other hardware are placed in the middle of the control bar. These objects can get caught by the tow bridle or tow rope at launch, resulting in the glider getting pulled by the control bar and quickly zooming up or to the side, out of control and locking out, while lifting the tail of the tug and driving it into the ground. For the mutual safety of both the glider pilot and the tug pilot, instruments should be placed to the side, near the corner bracket--not in the center of the base tube--when aerotowing. Unfortunately, many mountain pilots do not fully appreciate the risk and deadly potential consequences of placing their instruments in the center of their control bar when towing. Tug pilots and aerotow operators must inform pilots about this danger and ask them to place their instruments and hardware to the side, near their corner bracket.
LISA: Another issue to address is correct position for turns. The easy procedure for making a turn is to point the nose of the hang glider at the outside wing of the tug during the turn. For example, if the tug turns to the left, the hang glider pilot should wait for the right wing tip to get in front of them and then follow the right wing tip through the turn, keeping the nose of the glider pointed to that right wing tip throughout the turn. However, the shape or the cone of safety changes for turns relative to straight flight, as it is more likely to lockout if the glider gets low and slow on the inside of the turn, or high and fast on the outside of the turn.
TRACY: One last thing I want to address is length of tow rope. A standard length is 200 feet. In hang gliding, some hang gliding aerotow operations may use 150-foot lines, because of a restricted takeoff area, or to speed up operations and to make it easier for the tug and glider to circle together in a thermal during the tow. Other places may use 250-foot lines to expand the size of the cone of safety and to help prevent lockouts on tow.
LISA: We use the standard 200 foot towline for regular solo tows and a 300 foot towline for tandems and initial solo tows. It is simple trig and physics--if the right and left angles before locking out on a 200-foot tow rope is 20 degrees [ref 14], then the distance in feet from center to the right or left edge of the cone of safety (and locking out) is about 70 feet.
If the towrope is 150 feet long, then the distance to lockout is only 50 feet (and time is quite short); whereas, if the towrope is 300 feet long, the distance to lockout is 100 feet (and time and distance is twice as long as a 150-foot rope). Likewise, the area of the cone of safety behind a 300-foot towrope is four times larger than if behind a 150-foot tow rope.
TRACY: Right. Using a longer towrope for training gives students more time to traverse the legs of the cross and diamond and to learn how to deal with a lockout and how to avoid a lockout. A 300-foot long towrope, relative to a 150-foot long towrope, will give students twice the amount of time to practice out-of-position maneuvers. Obviously, a longer towrope is safer for first solo pilots. A 300-foot long tow rope, relative to a 150-foot long rope, will give initial solo pilots twice the amount of time and distance (100 vs 50 feet to the side) to avoid/recover from a lockout situation.
LISA: A longer towrope is safer for the tandem instructor, too. It provides lockout prevention and puts more distance between the glider and the prop wash of the tug when launching. A heavier tandem glider will roll further on the ground before taking off and not climb as fast as a solo glider, so it is beneficial to have a longer tow rope that gives the tandem glider more time and distance to lift off and climb above the prop wash at launch.
TRACY: Otherwise, a standard 200-foot long towrope is good for towing experienced solo pilots, as it enables more controllable towing of solo pilots in rougher air, and presents a reasonable size for the cone of safety.
TRACY: You can view a simulation of the "cross" and "diamond" maneuvers used for tandem hang gliding aerotow instruction at:
http://ihanglide.com/aerotow/
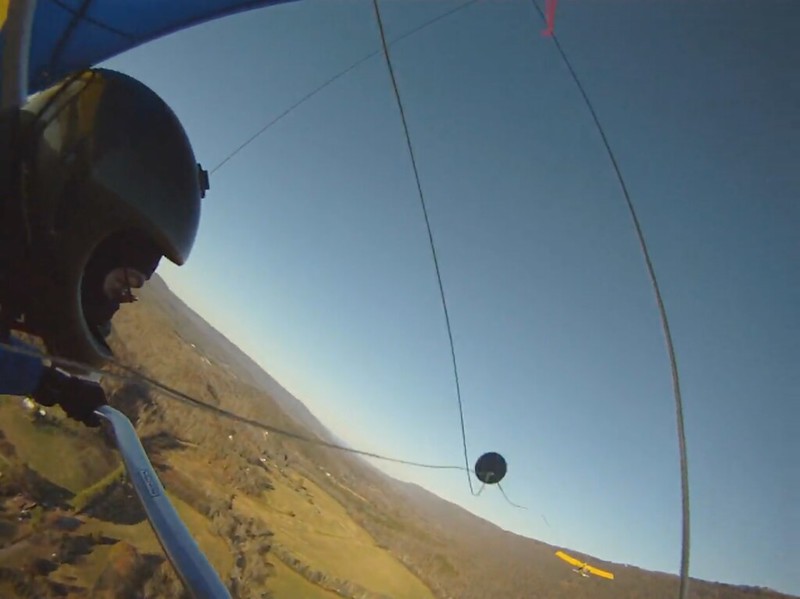
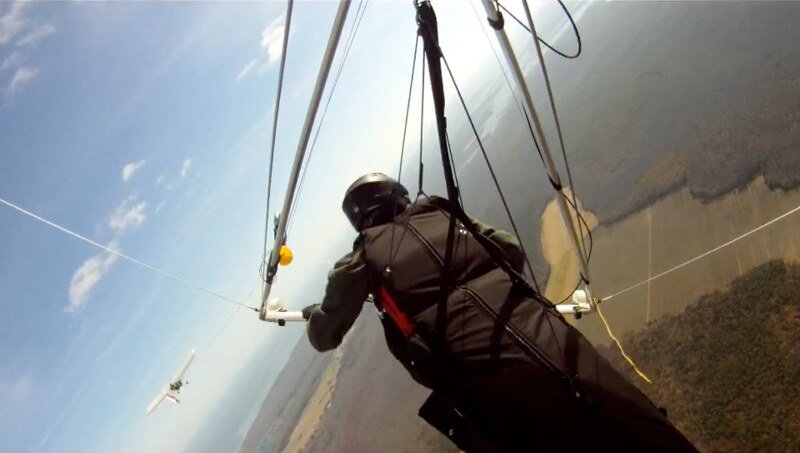
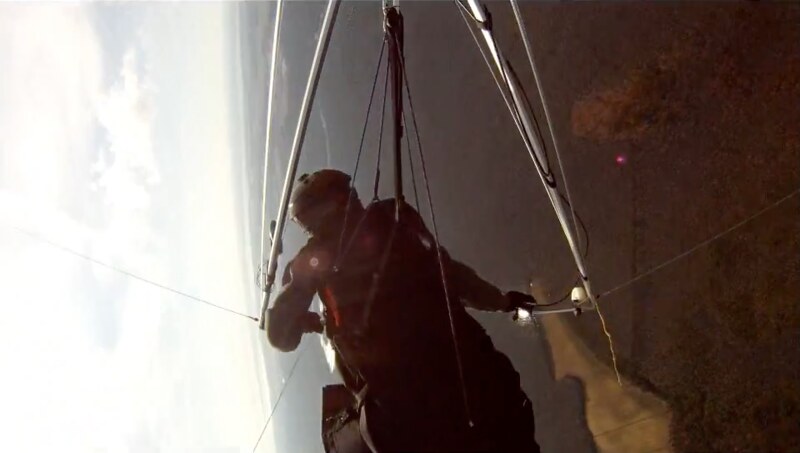
produced by Dean Funk [ref 16]. We also have some air-to-air photos posted on Bob Grant's Skydog website [ref 17] that show the boundaries of the cone of safety while performing the "cross" maneuver.
Finally, we want to thank Trevor Gildersleeve for producing the diagrams displayed in this month's article.
-
Figure 1: The Sweet Spot.
The Sweet (Center)
Figure 2: The High (12 o'clock) Position.
High Position (12 o'clock)
Figure 3: The Low (6 o'clock) Position.
Low Position (6 o'clock)
Figure 4: The Left (9 o'clock) Position.
Left Position (9 o'clock)
Figure 5: The Right (3 o'clock) Position.
Right Position (3 o'clock)
-
REFERENCES
01. "Towline/Higher Education: How to Teach Better, Higher, Faster." by Lisa Colletti and Tracy Tillman, Hang Gliding and Paragliding magazine, June 2011, pp. 16-21:
https://www.ushpa.aero/member_magazine_current.asp
or
http://issuu.com/us_hang_gliding_paragliding/docs/1106_web?mode=embed&viewMode=presentation&layout=http%3A%2F%2Fskin.issuu.com%2Fv%2Flight%2Flayoutxml&showFlipBtn=true
02. "Unconventional Wisdom" by Doug Rozendaal. AOPA Pilot magazine, July 2011, p.25.
03. "Law of Primacy.":
http://en.wikipedia.org/wiki/Law_of_primacy_in_persuasion
04. "Higher Education: How to Get the USHPA Aerotow Rating." by Lisa Colletti and Tracy Tillman, Hang Gliding and Paragliding magazine, July 2011, pp. 20-25:
https://www.ushpa.aero/member_magazine_current.asp
or
http://issuu.com/us_hang_gliding_paragliding/docs/1101_web?mode=embed&viewMode=presentation&layout=http%3A%2F%2Fskin.issuu.com%2Fv%2Flight%2Flayoutxml&showFlipBtn=true
05. "Standard Operating Procedures of the USHPA": SOP 12-02.12(A.5),
https://www.ushpa.aero/documents/SOP/ushpa_sop_book.pdf
06. "Boxing the Wake." In "Glider Flying Handbook" by FAA, 2003, pp. 7-10,11:
http://www.faa.gov/library/manuals/aircraft/glider_handbook/media/faa-h-8083-13.pdf
07. Online Soaring magazine archive:
http://ssa.org/magazine/archive/
08. "Fokker - Between the Wars.":
http://www.globalsecurity.org/military/world/europe/fokker-2.htm
09. "Gottlob Espenlaub.":
http://en.wikipedia.org/wiki/Gottlob_Espenlaub
and
http://en.wikipedia.org/wiki/File:Espenlaub_1921_hangglider.jpg
10. "Fafnir (a mythical dragon)."
http://www.scribd.com/doc/18019283/Fafnir-glider-history
11. "Tailview: 2,500 Kills" by Barrett Tillman. Flight Journal magazine, German Fighters collectors edition, Winter 2011, p. 90
12. "Antonov A-7 Glider."
http://www.modelingmadness.com/review/allies/ussr/attarda7.htm
13. Personal communication with Don Abbe, curator of the Silent Wings Museum, Lubbock, Texas.
http://www.silentwingsmuseum.com/
14. "Towing Aloft." by Dennis Pagen and Bill Bryden.
Figure 8-12: Maximum Deviation Angle, p.320. Available from USHPA:
http://www.ushpa.aero/store/
15. "How to Talk Minnesotan." by Howard Mohr, 1981. Penguin Books.
16. "IHangglide's Aerotow Maneuver Simulation." by Dean Funk, 2010:
http://ihanglide.com/aerotow/
17. "SkydogSports.com web site: Tandem Aerotowing Photo Page." by Bob Grant:
http://www.skydogsports.com/dfsc/tandem.htm



 )
)  Good luck if it does. No 911 calls allowed. My friend was lucky, the nurse on hand convinced the owner not to move him, this after he snatched and threw her phone away.